Scenario Description
In scenarios of remote work or cross-regional collaboration, users often face challenges accessing local storage resources directly. JumpServer's Windows disk mounting feature provides a solution by allowing users to mount their local PC disks onto a remote Windows system. This enables users to remotely access and use local files, facilitating convenient resource sharing and efficient management.
Operation Instructions
For PCs running MAC and Windows, how to perform disk mounting on a remote Windows system.
Install RDP Client
Switch to the JumpServer Web terminal page, click on <Help> at the top of the page, select <Download>, and navigate to the Client download page.
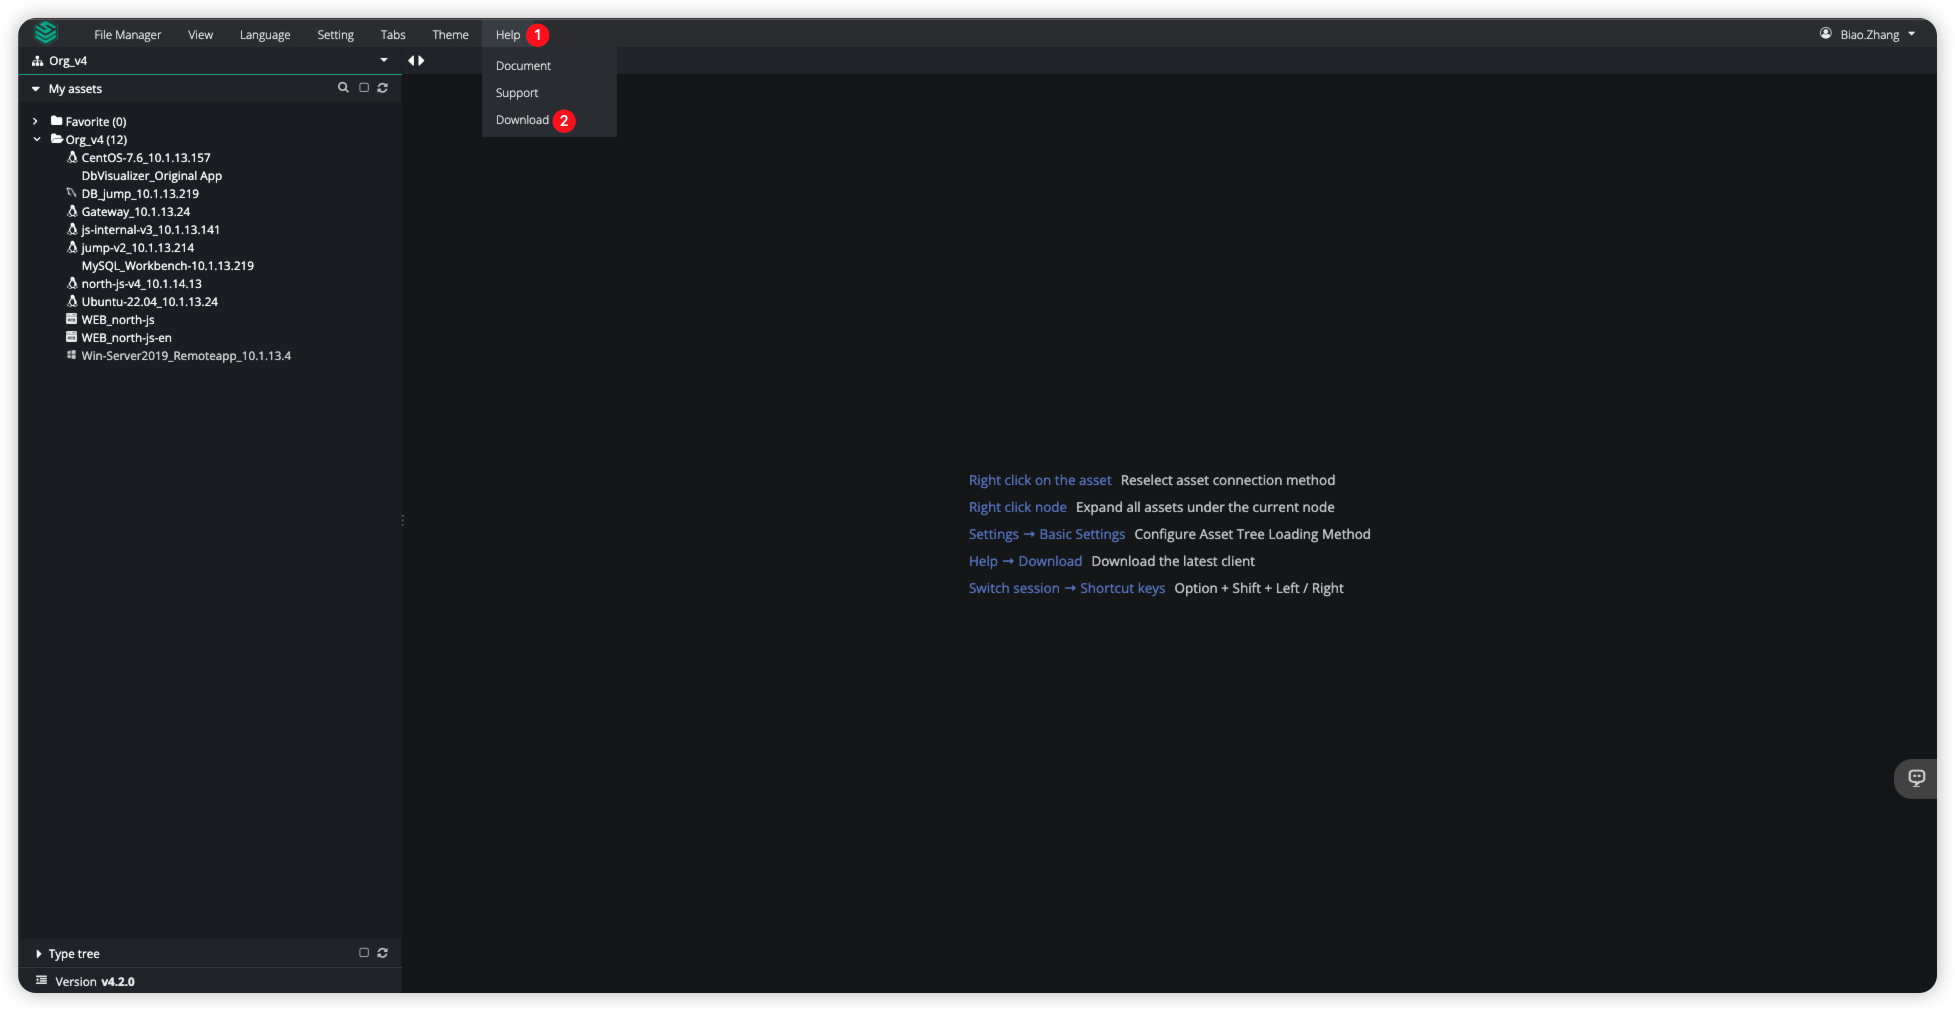
On the Client download page, we can download the JumpServer Client based on our PC type.
Note: The MAC system requires an additional download of the Microsoft RDP Official Client to support Windows client connections.
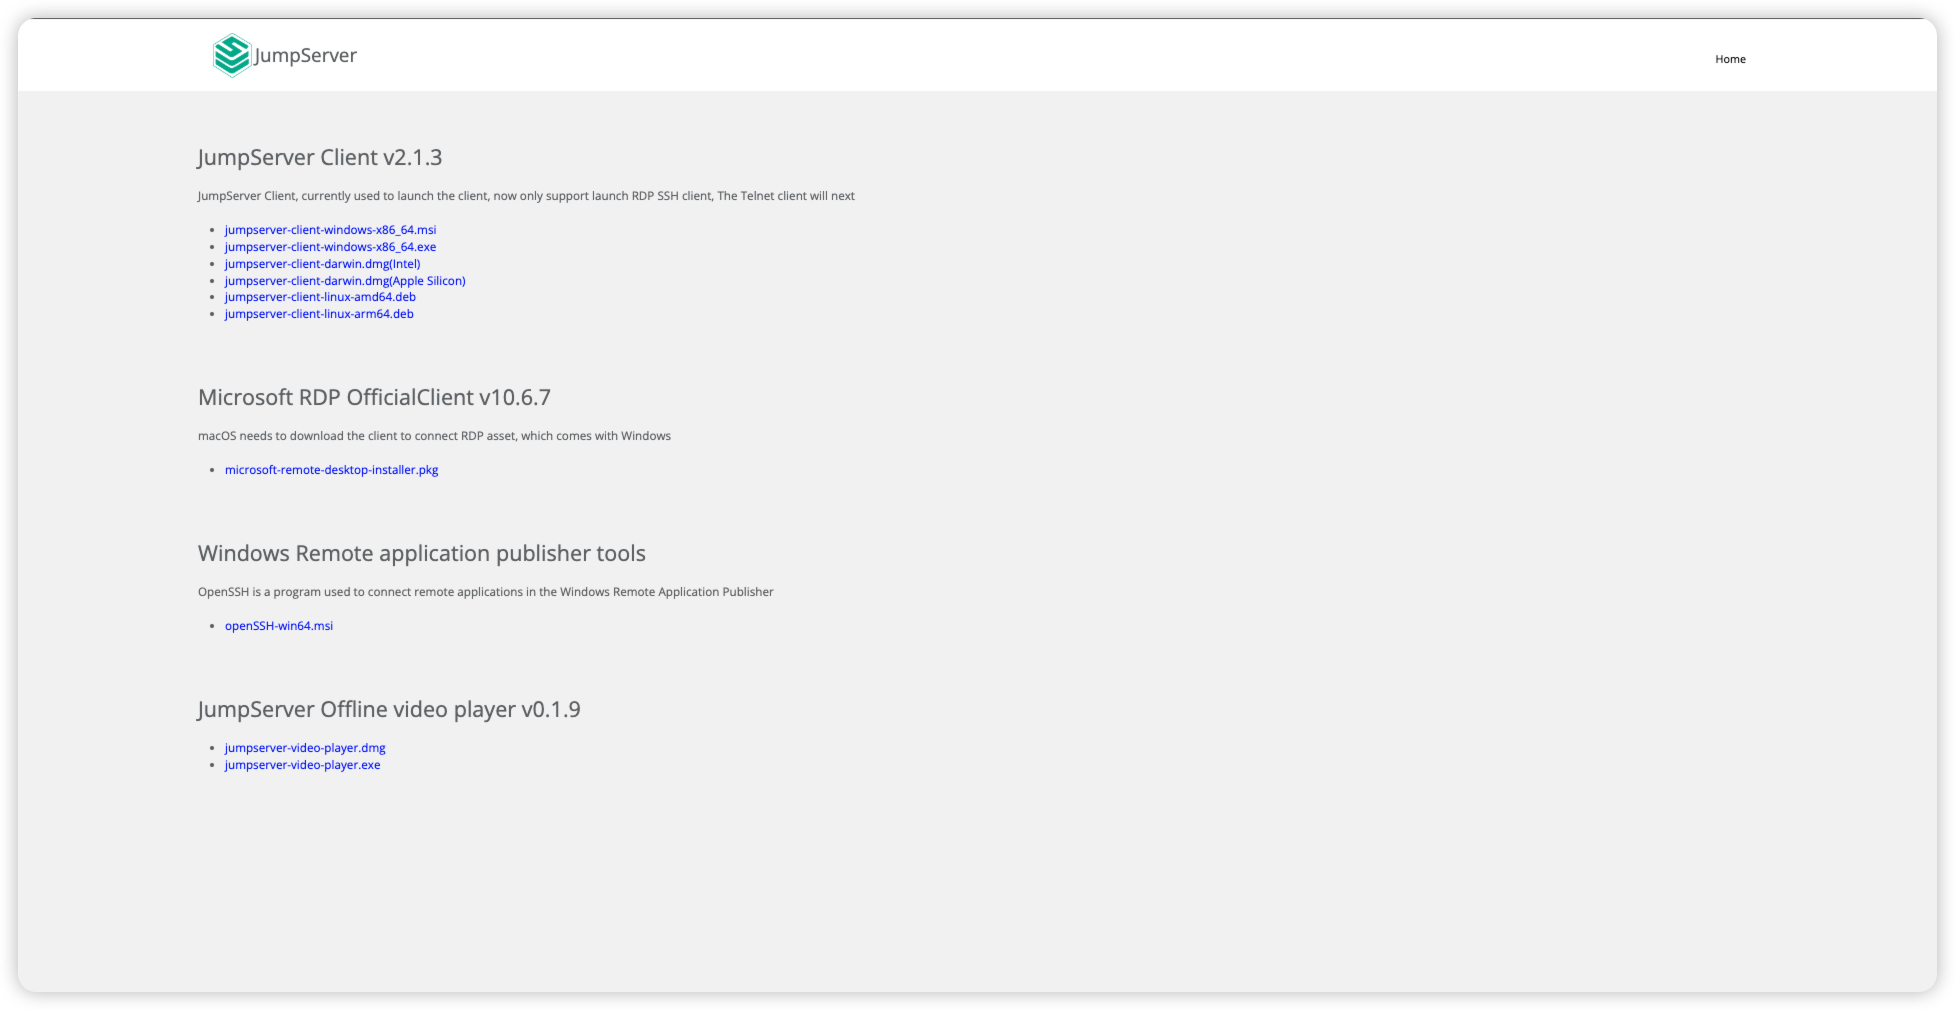
After the download is complete, install the JumpServer Client locally on the PC.
Set up the redirection path
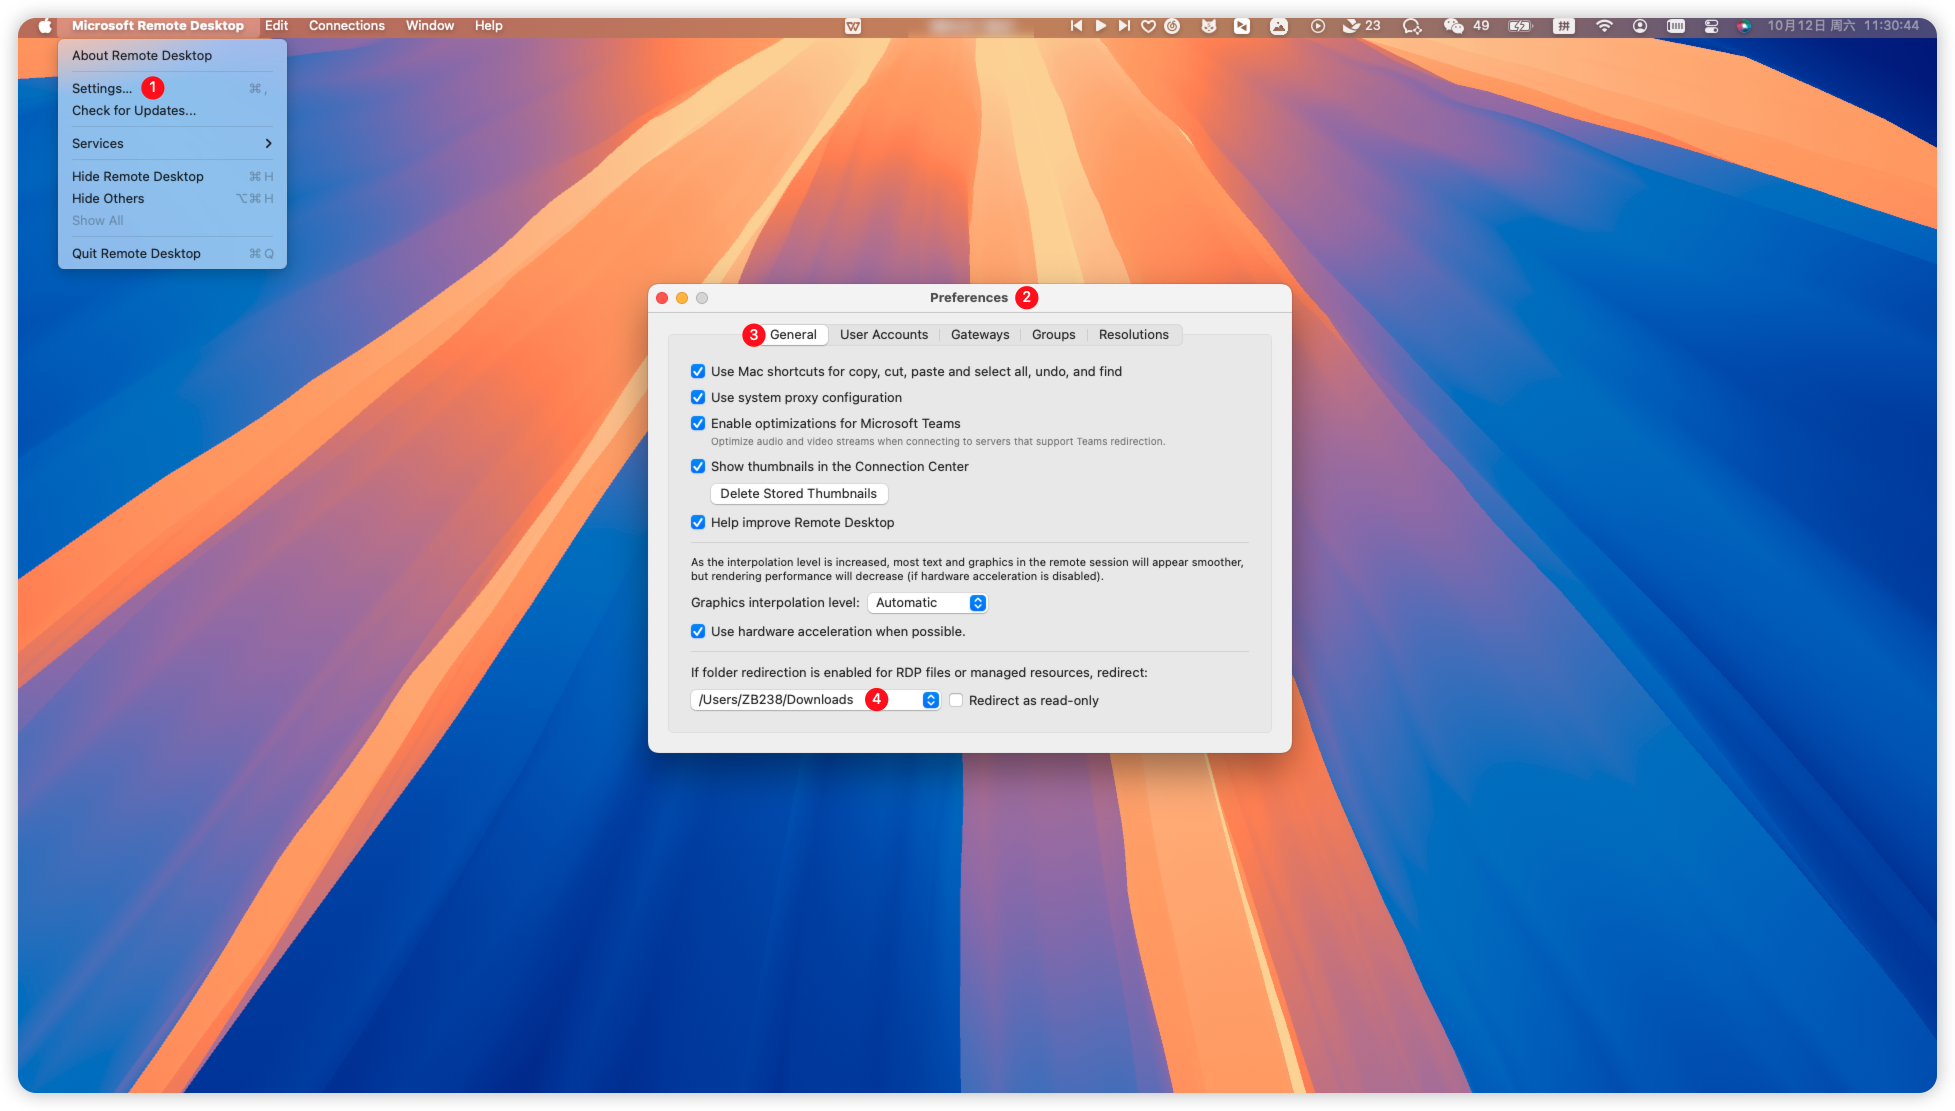
In the case of a PC type as MAC, it is necessary to configure the redirection path. Windows defaults to mounting all disks, so no separate configuration is required.
Open the Microsoft Remote Desktop software, select <Settings> to open the Preference page, and configure the file redirection path in the <General> tab.
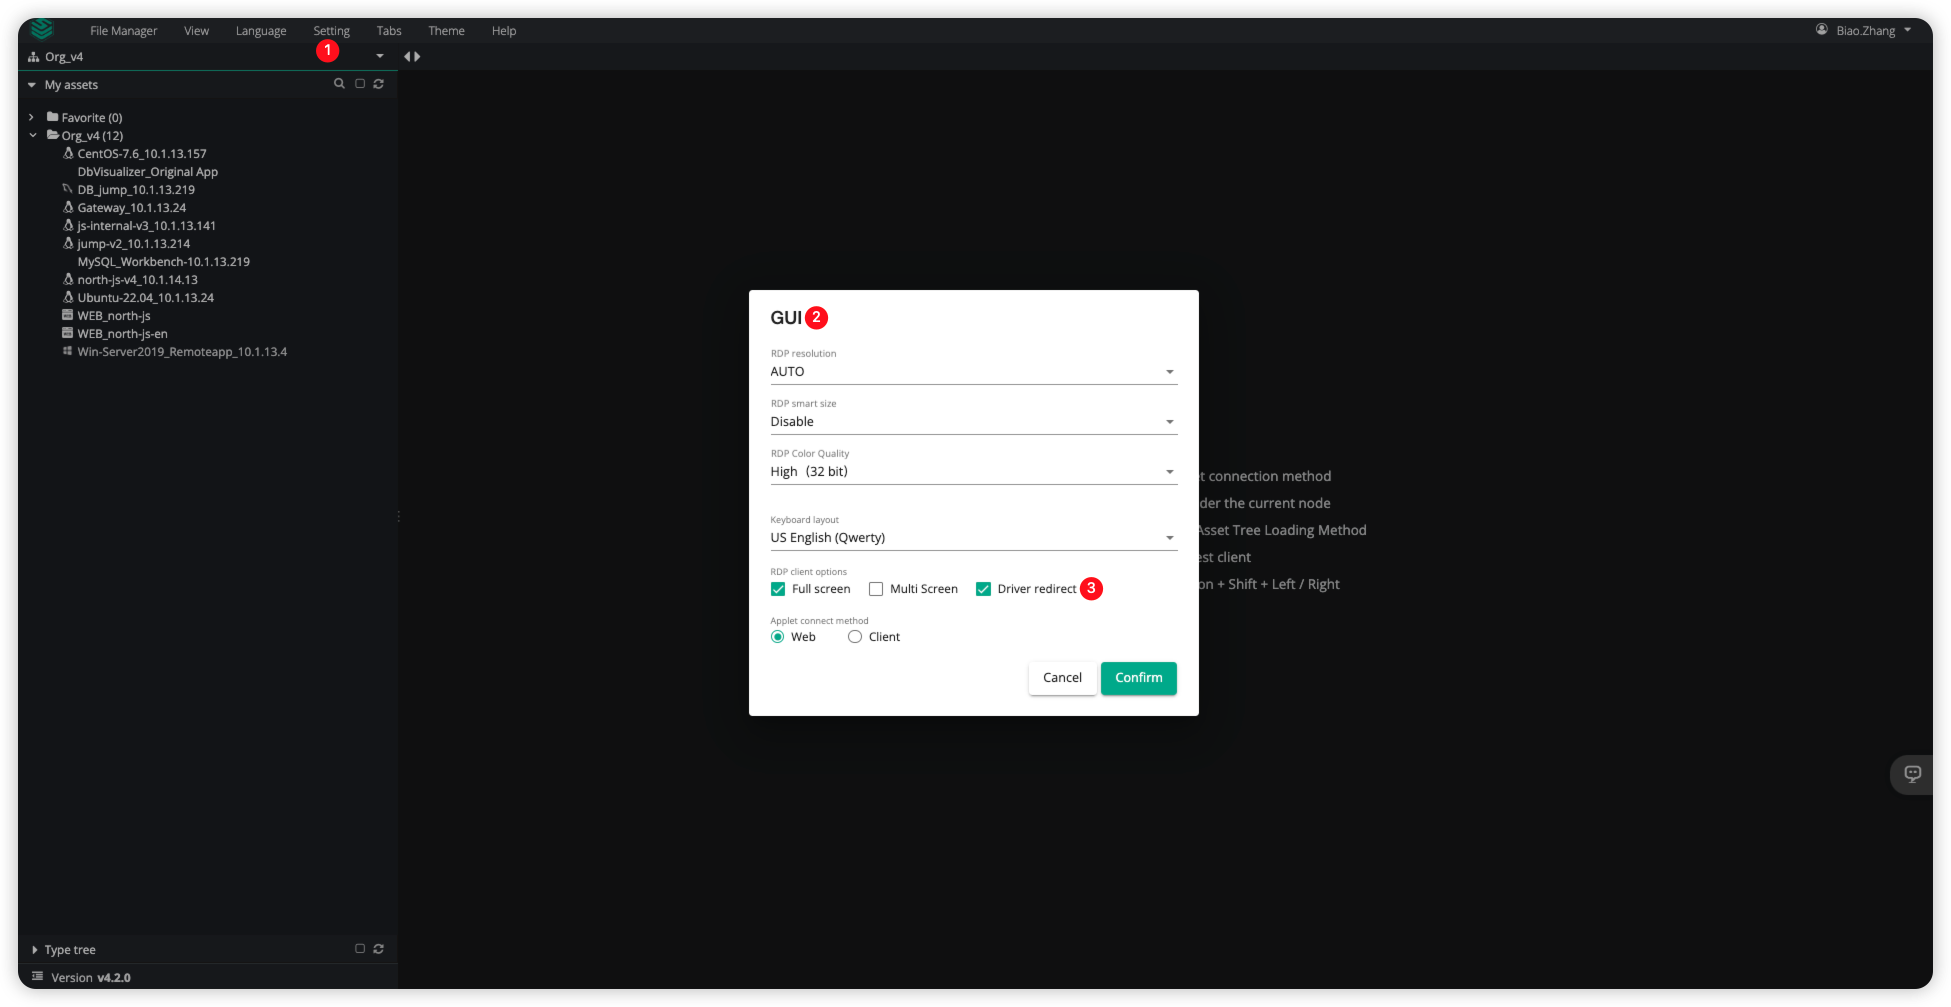
Enable Driver redirect
On the JumpServer Web terminal page, click on the <Settings> at the top of the page, then click on <GUI>. In the <RDP client options settings>, check <Driver redirect> to enable the disk mounting feature.
Function Verification
Verify the effectiveness of disk mounting from the local PC to the remote Windows system.
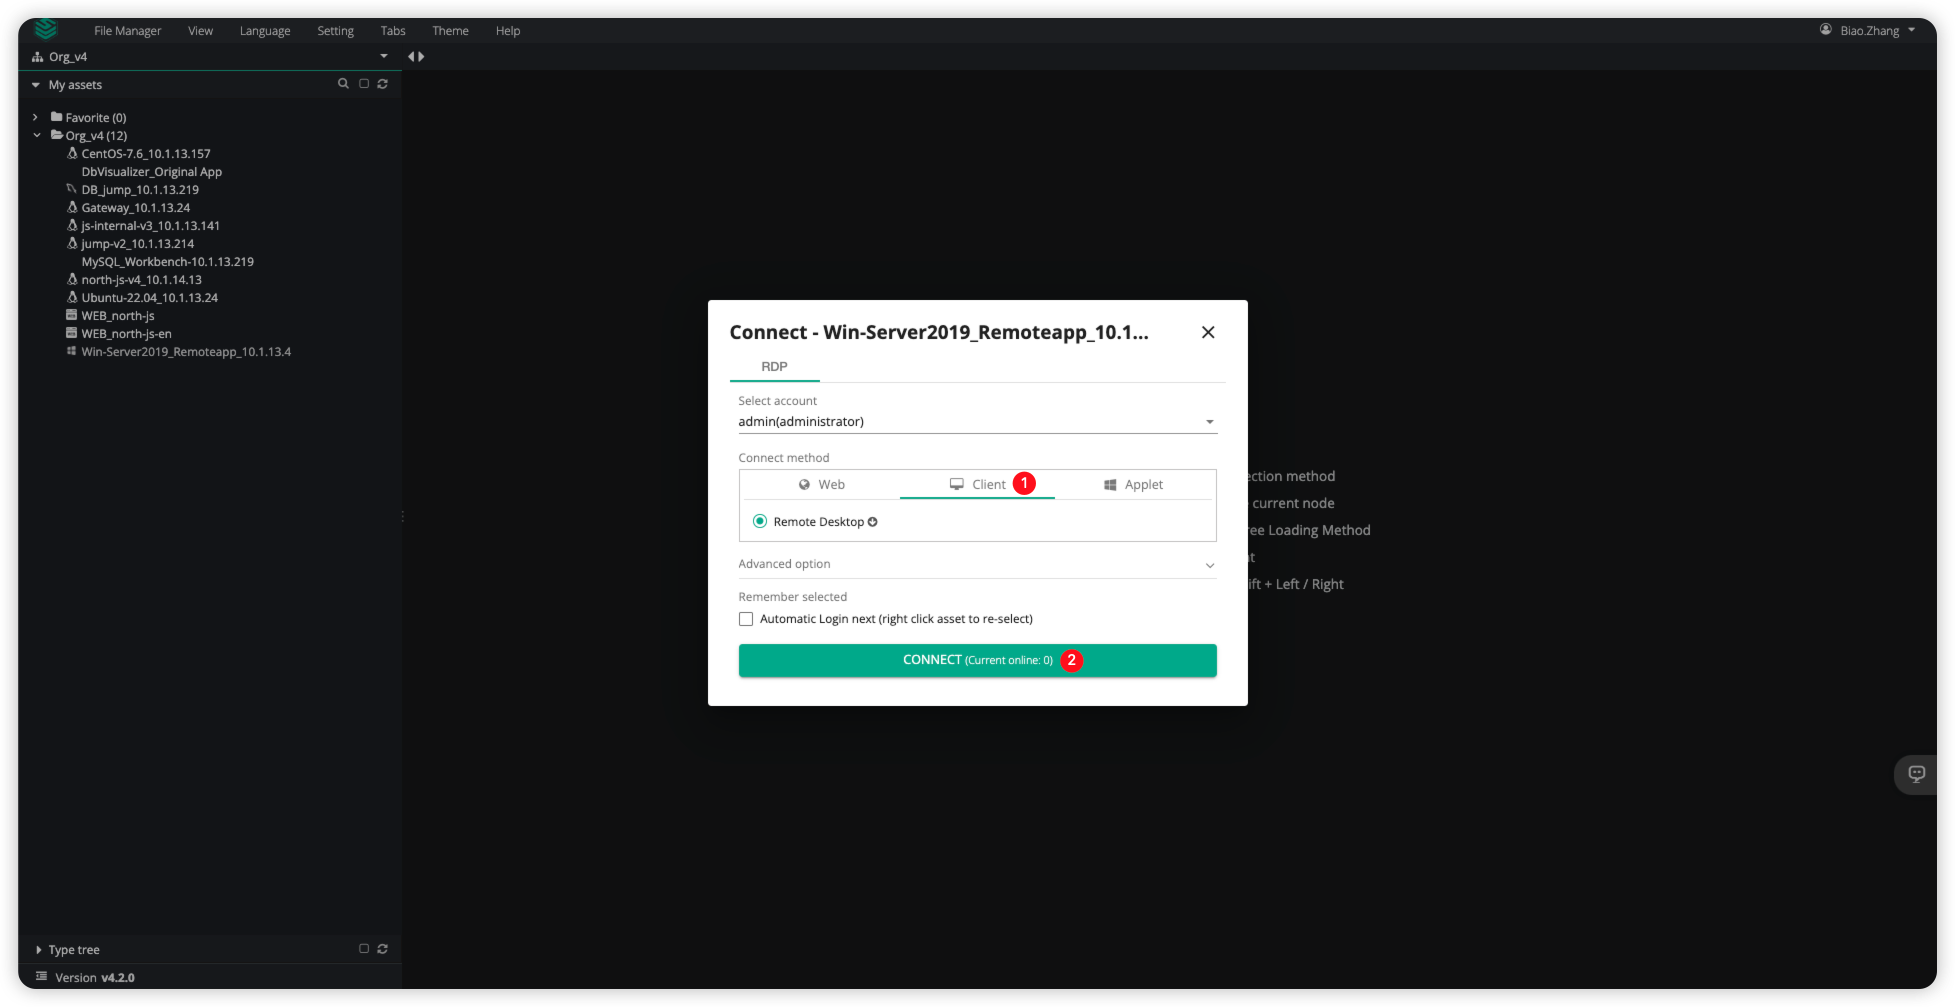
Select the remote Windows asset and choose the Client method for the Connect type to establish the connection.
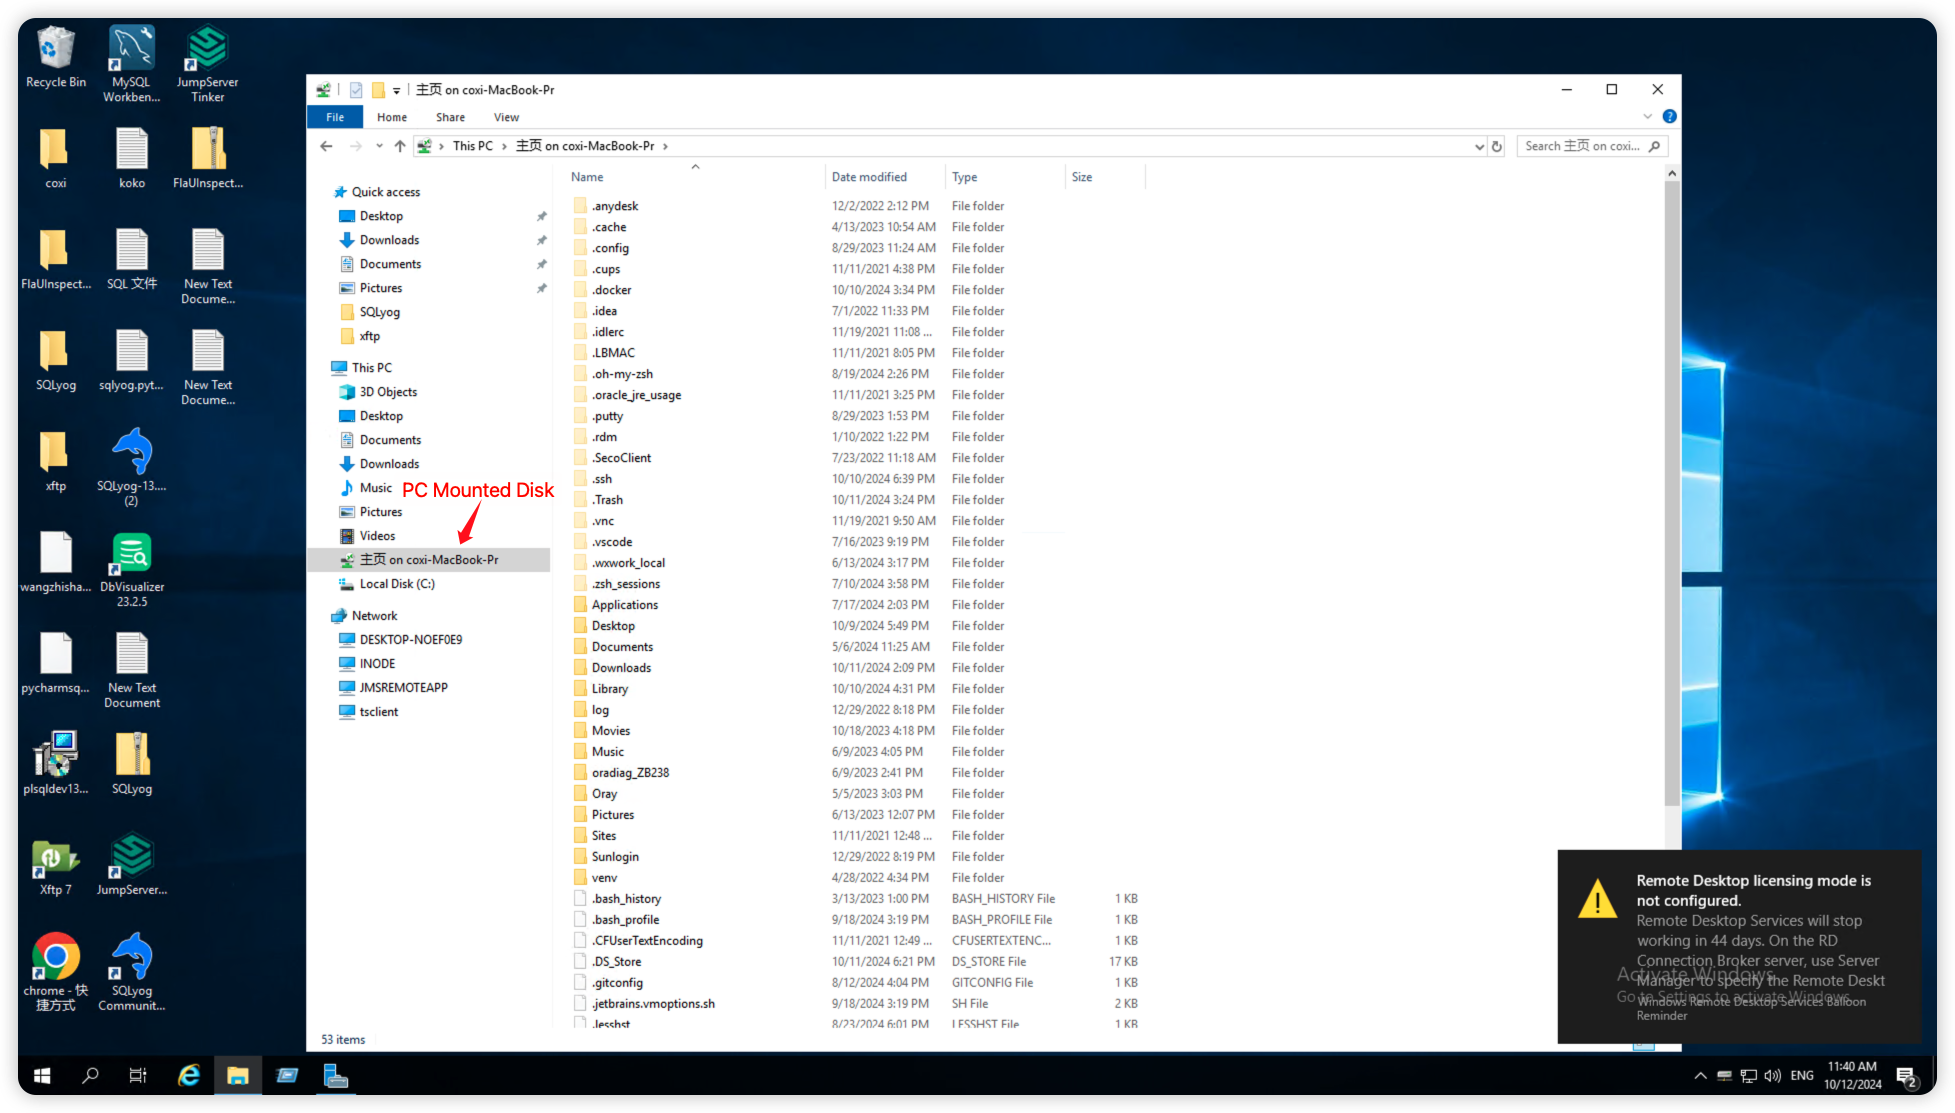
After connecting to the remote Windows system, you can see the mounted disk of the PC in <File Explorer>, where you can transfer files.