Scenario Description
In the daily work of administrators, there is often a need to manage special assets such as network devices and third-party clients in a unified manner. This includes centralized authorization and behavior auditing of these assets. The remote application feature of JumpServer effectively addresses these management needs.
Function Description
JumpServer supports creating web-based resource access through remote application functionality and connecting to databases using client tools like Navicat and DBeaver.
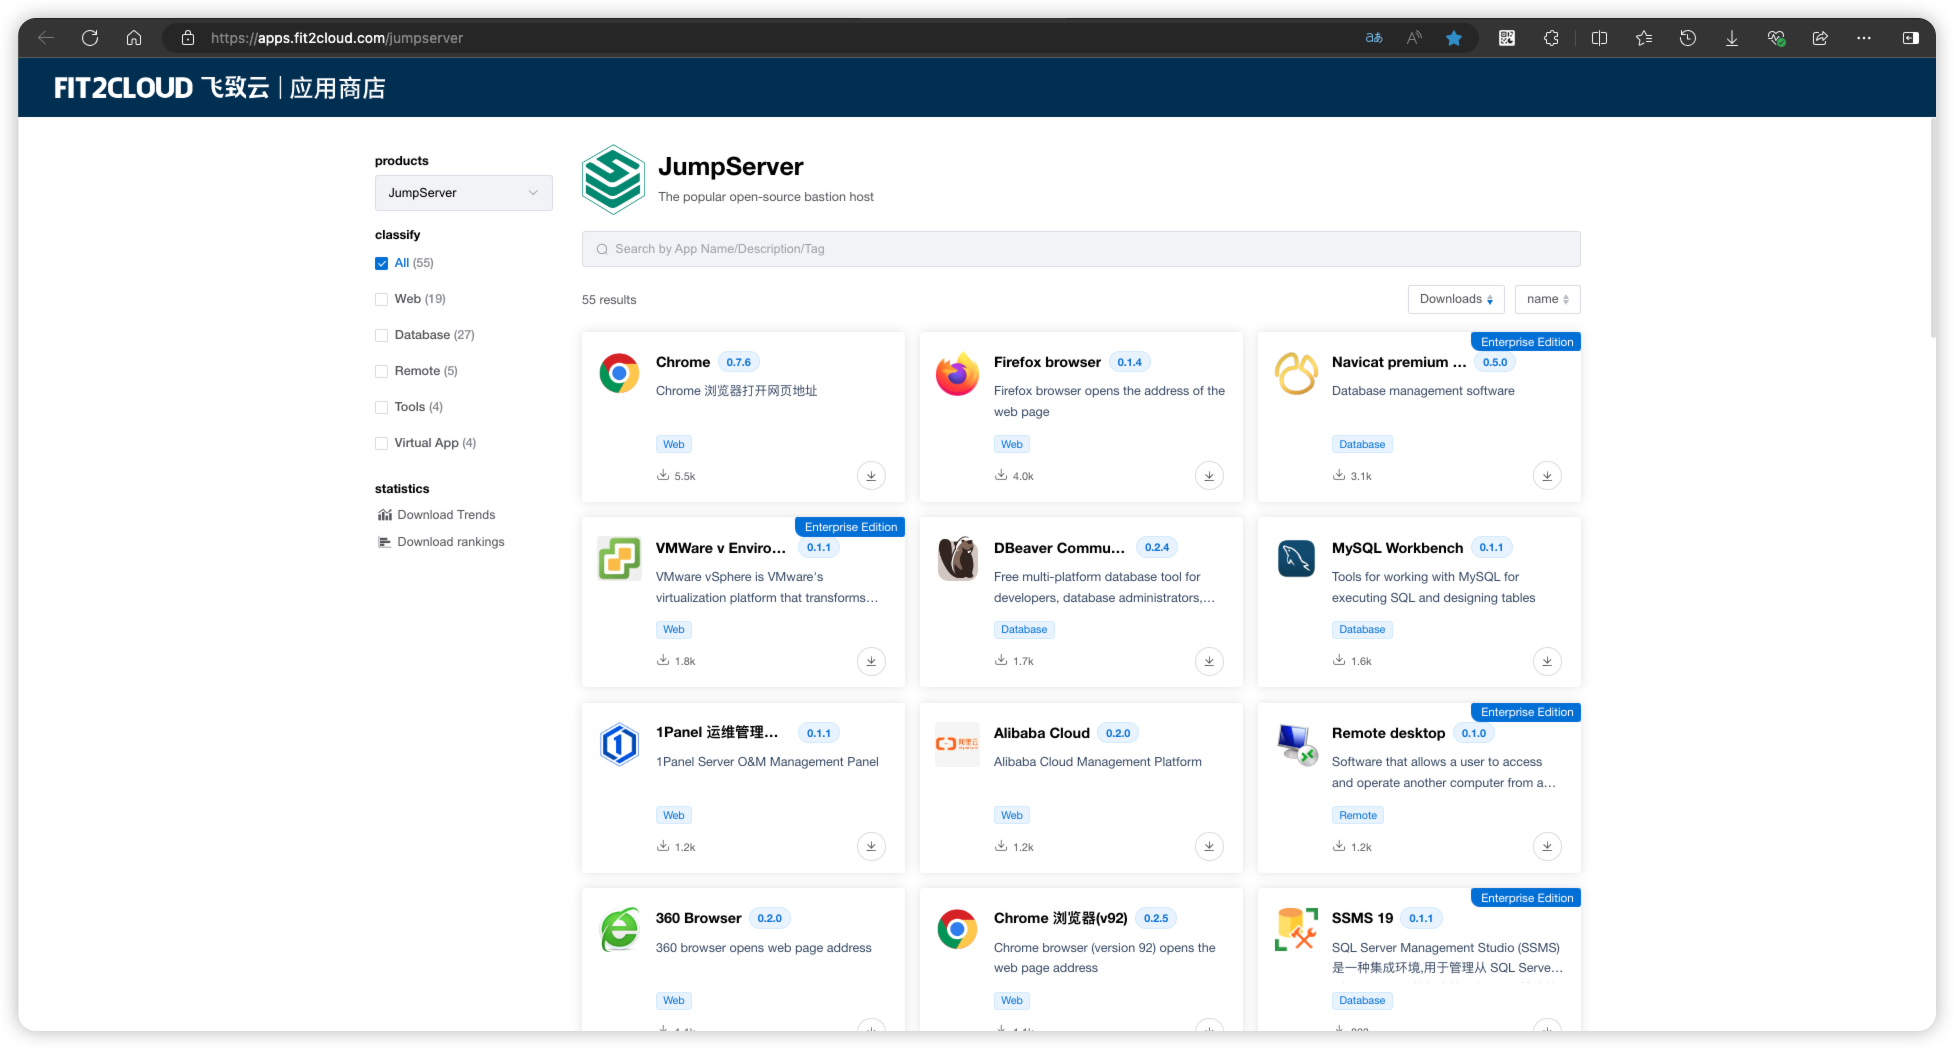
For the management of remote applications, we provide the FIT2CLOUD official application marketplace: <https://apps.fit2cloud.com/jumpserver>, which includes various remote applications such as the Firefox browser, SSMS, Alibaba Cloud Management Platform, and more.
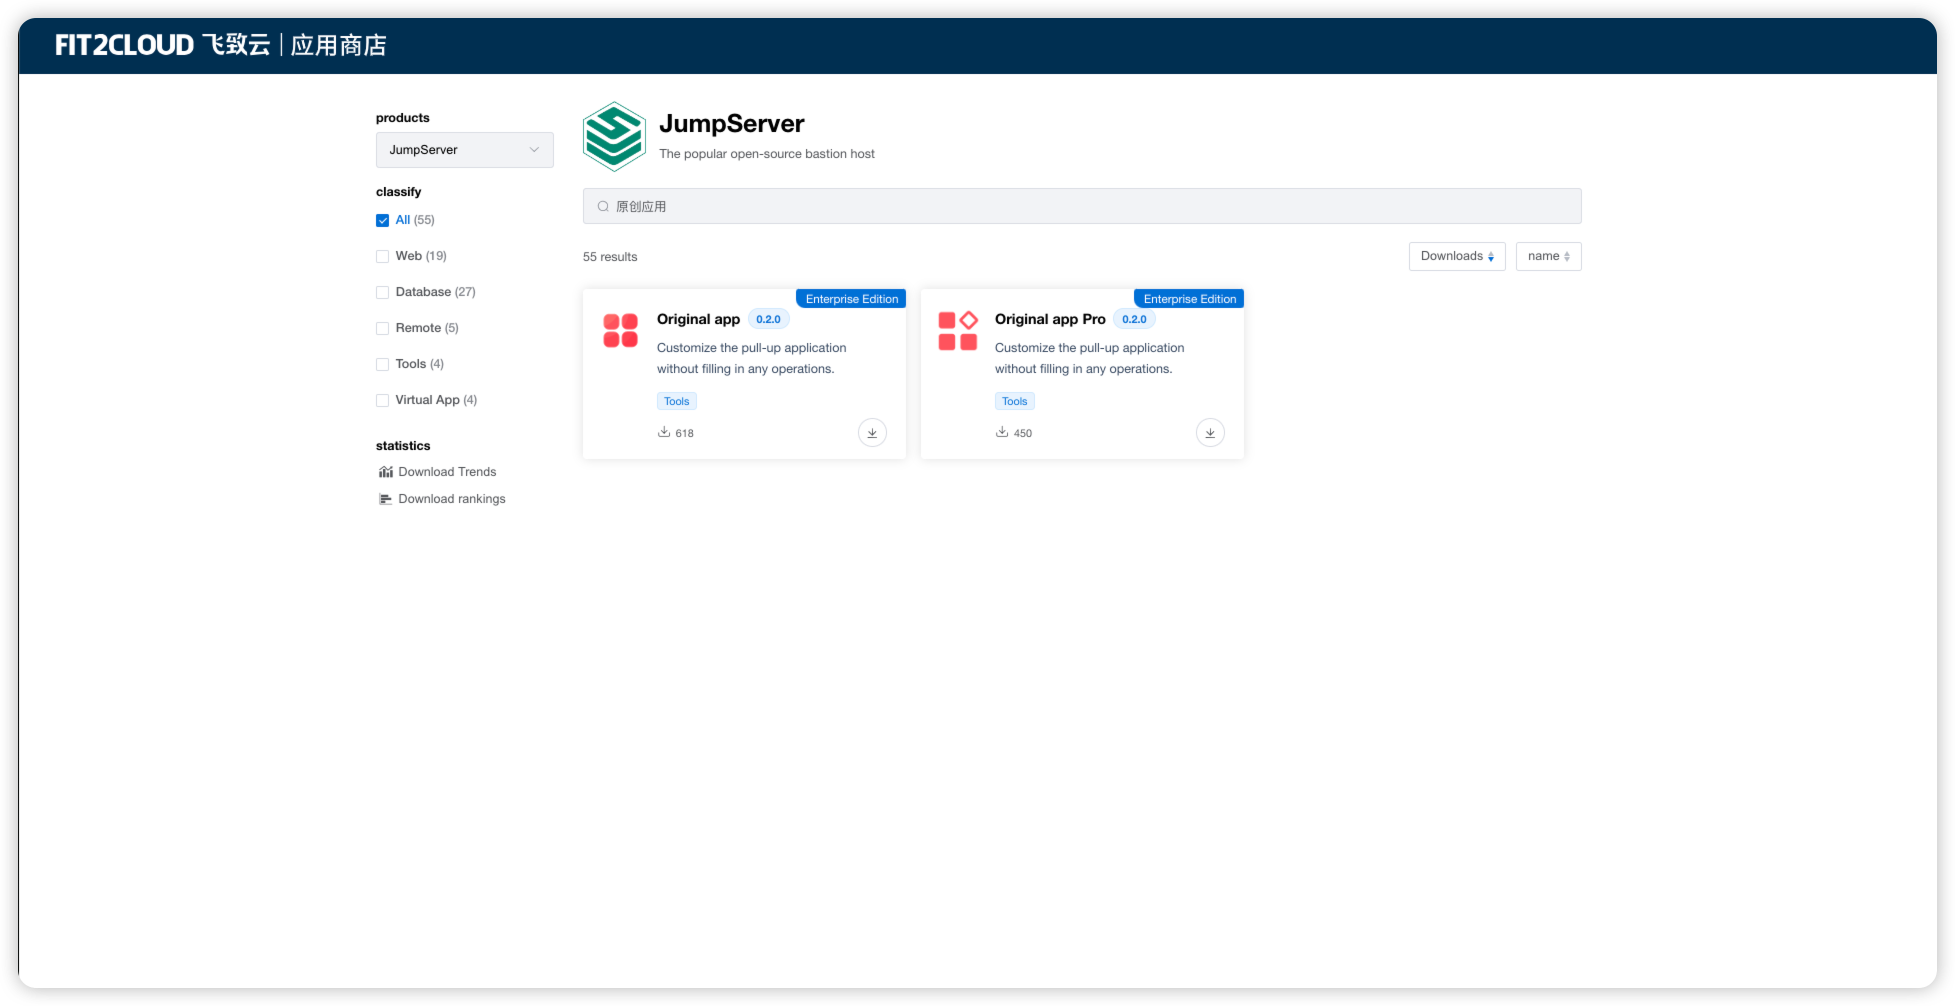
However, the program packages in the application marketplace cannot cover all applications. Some users wish to publish custom applications as tools, but creating a remote application package requires a basic knowledge of Python. To facilitate users, the JumpServer team has developed an <Original app> to support the publishing of custom applications.
The <Original app> refers to the custom applications that need to be published, and no pre-filling operation is performed when accessing these applications.
<Original app Pro> supports multiple instances of the application. (Multiple instances refer to opening multiple assets of the same type through the remote application, using the same publishing machine account to launch multiple application windows.)
Installation and Usage
The steps to publish a custom program are as follows:
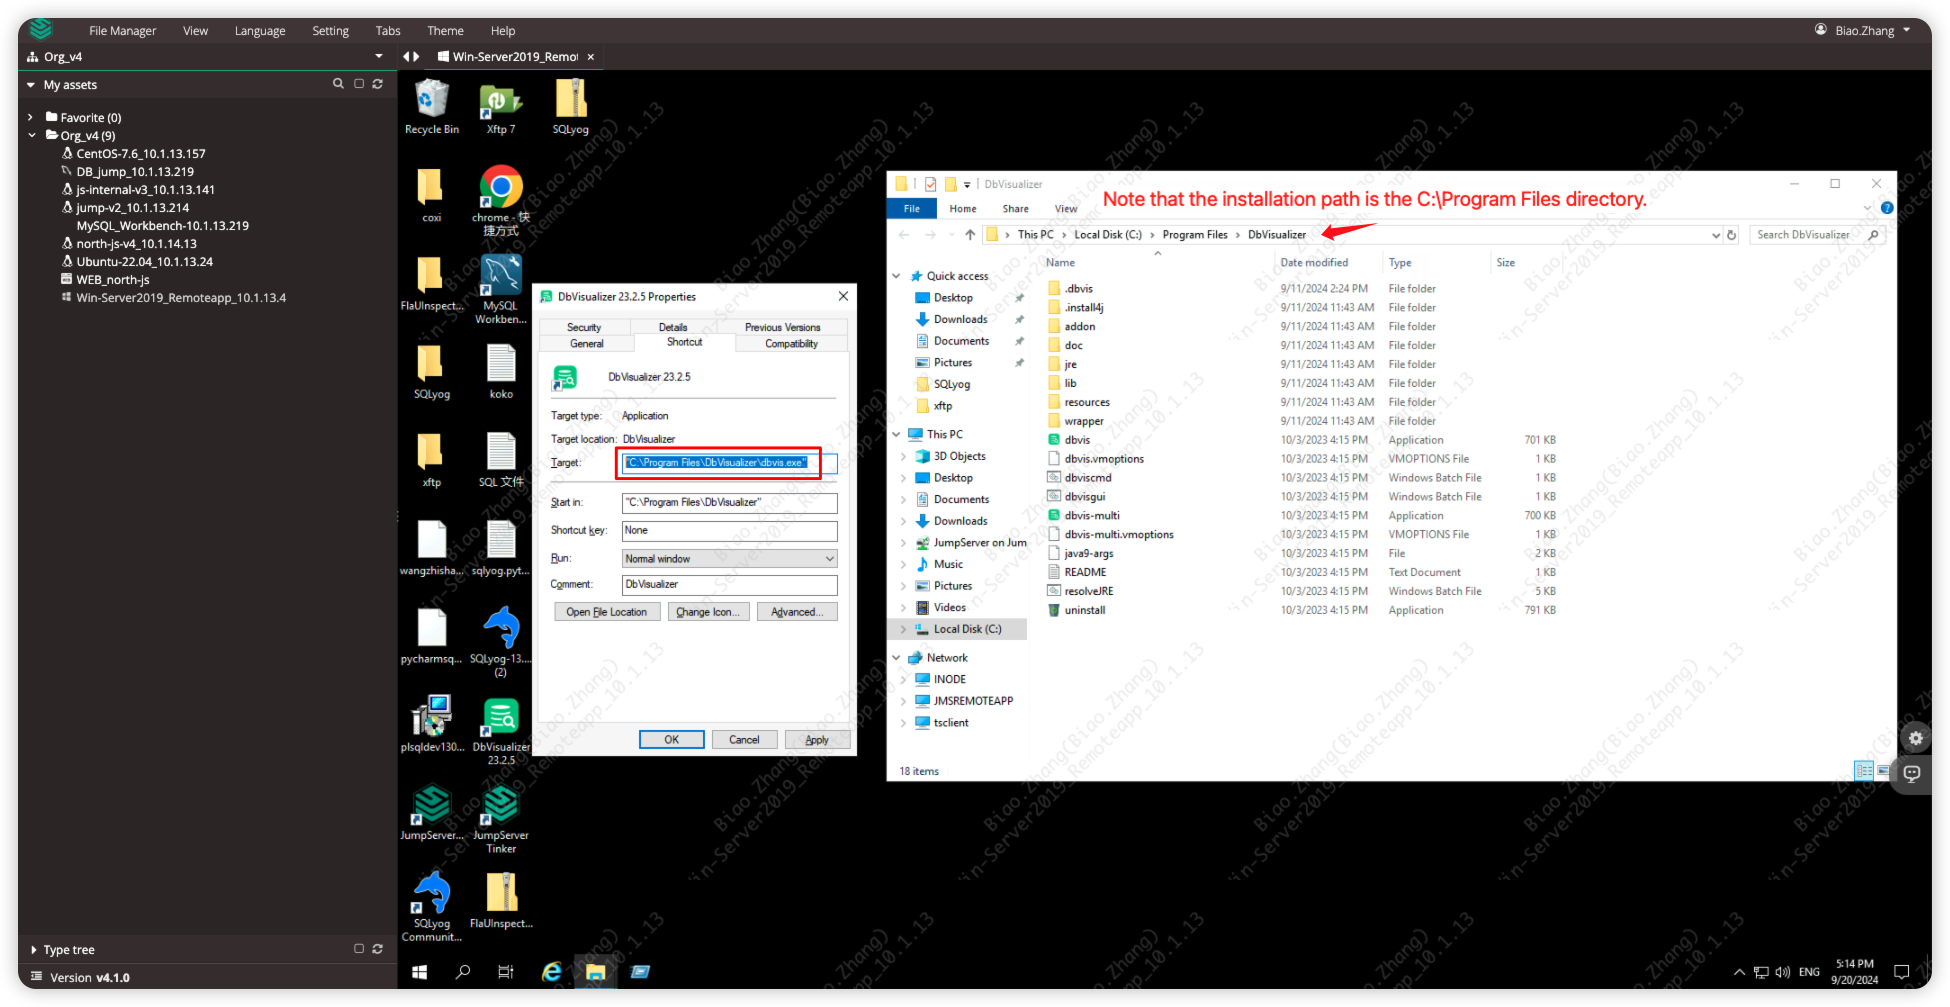
Manually install the custom application on the remote application publishing machine
The installation path must be accessible to all users, such as in the C:\Program Files directory; it should not be installed in a personal directory, e.g., C:\Users{Username}. If the program defaults to the personal user directory, the installation directory needs to be adjusted.
If there are multiple application publishing machines in JumpServer, the program needs to be installed on each machine, ensuring that the installation directory is consistent across all application publishing machines.
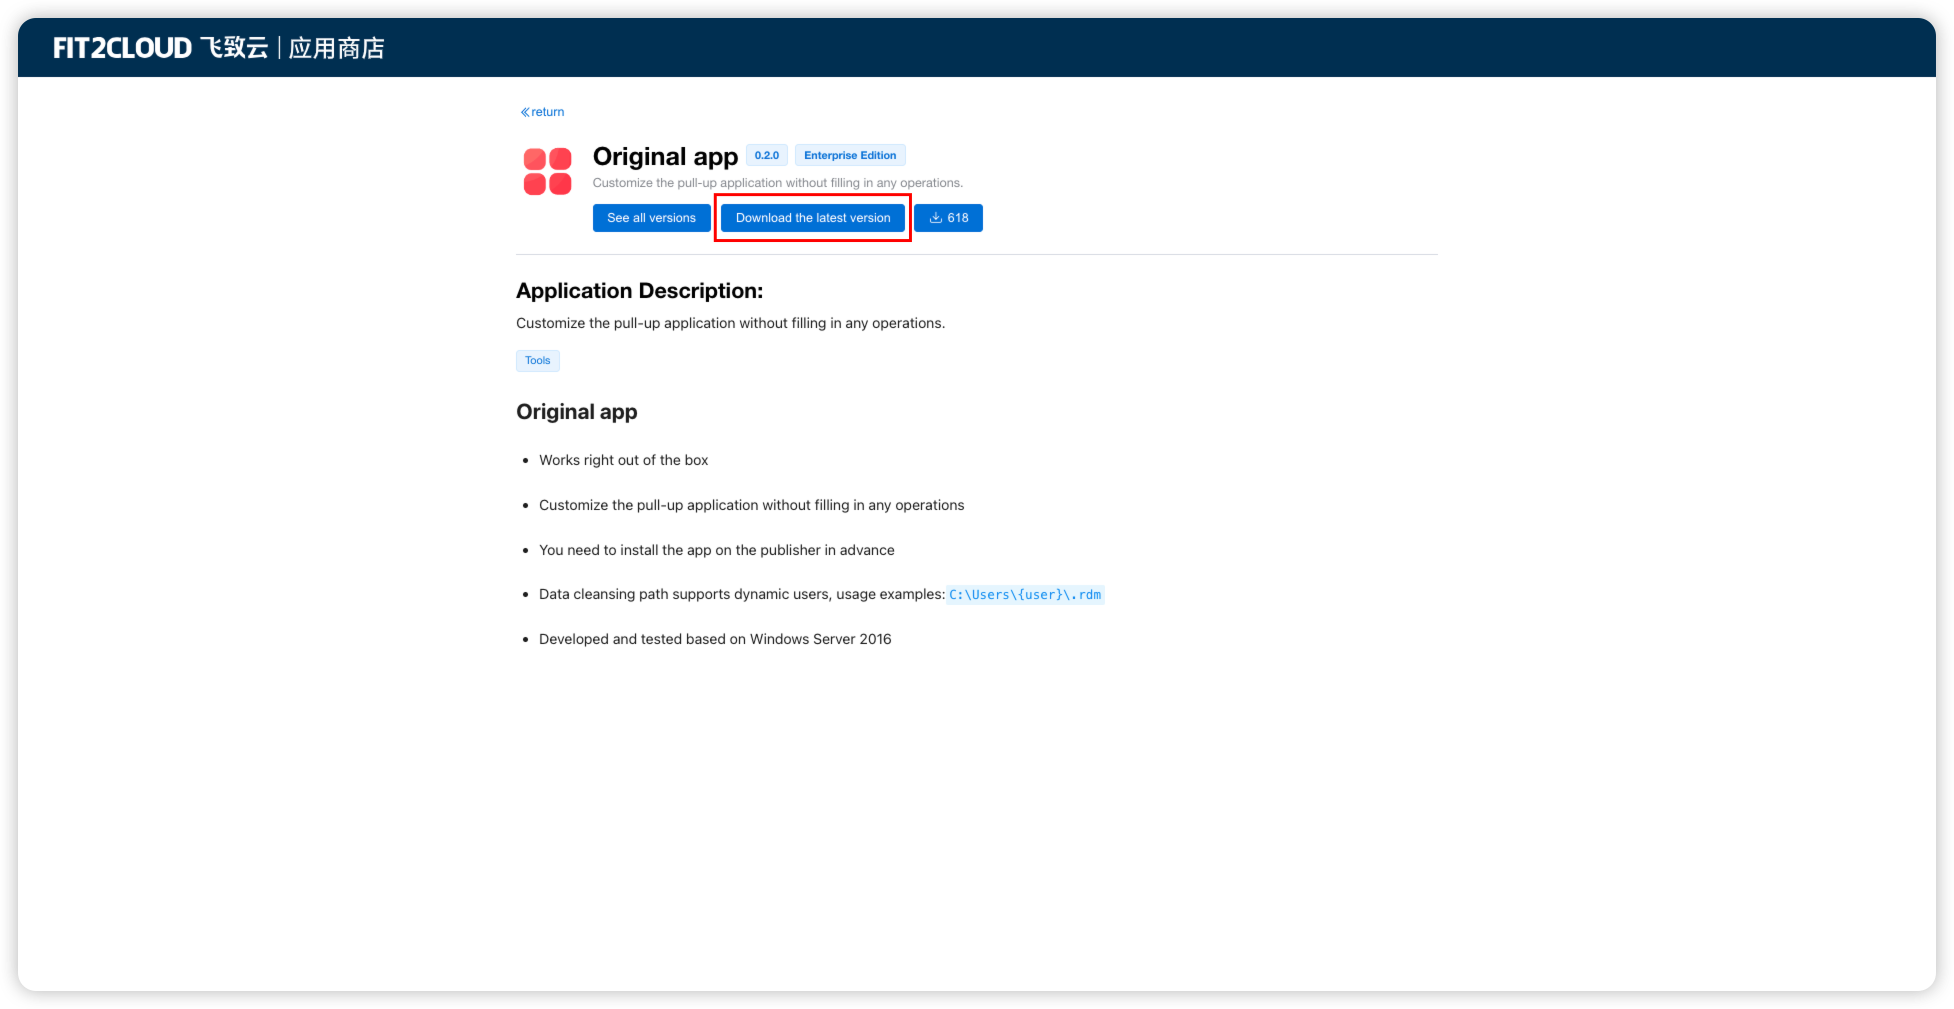
Download the Original App program package
Access the FIT2CLOUD official application marketplace <https://apps.fit2cloud.com/jumpserver> to download the <Original App> program package.
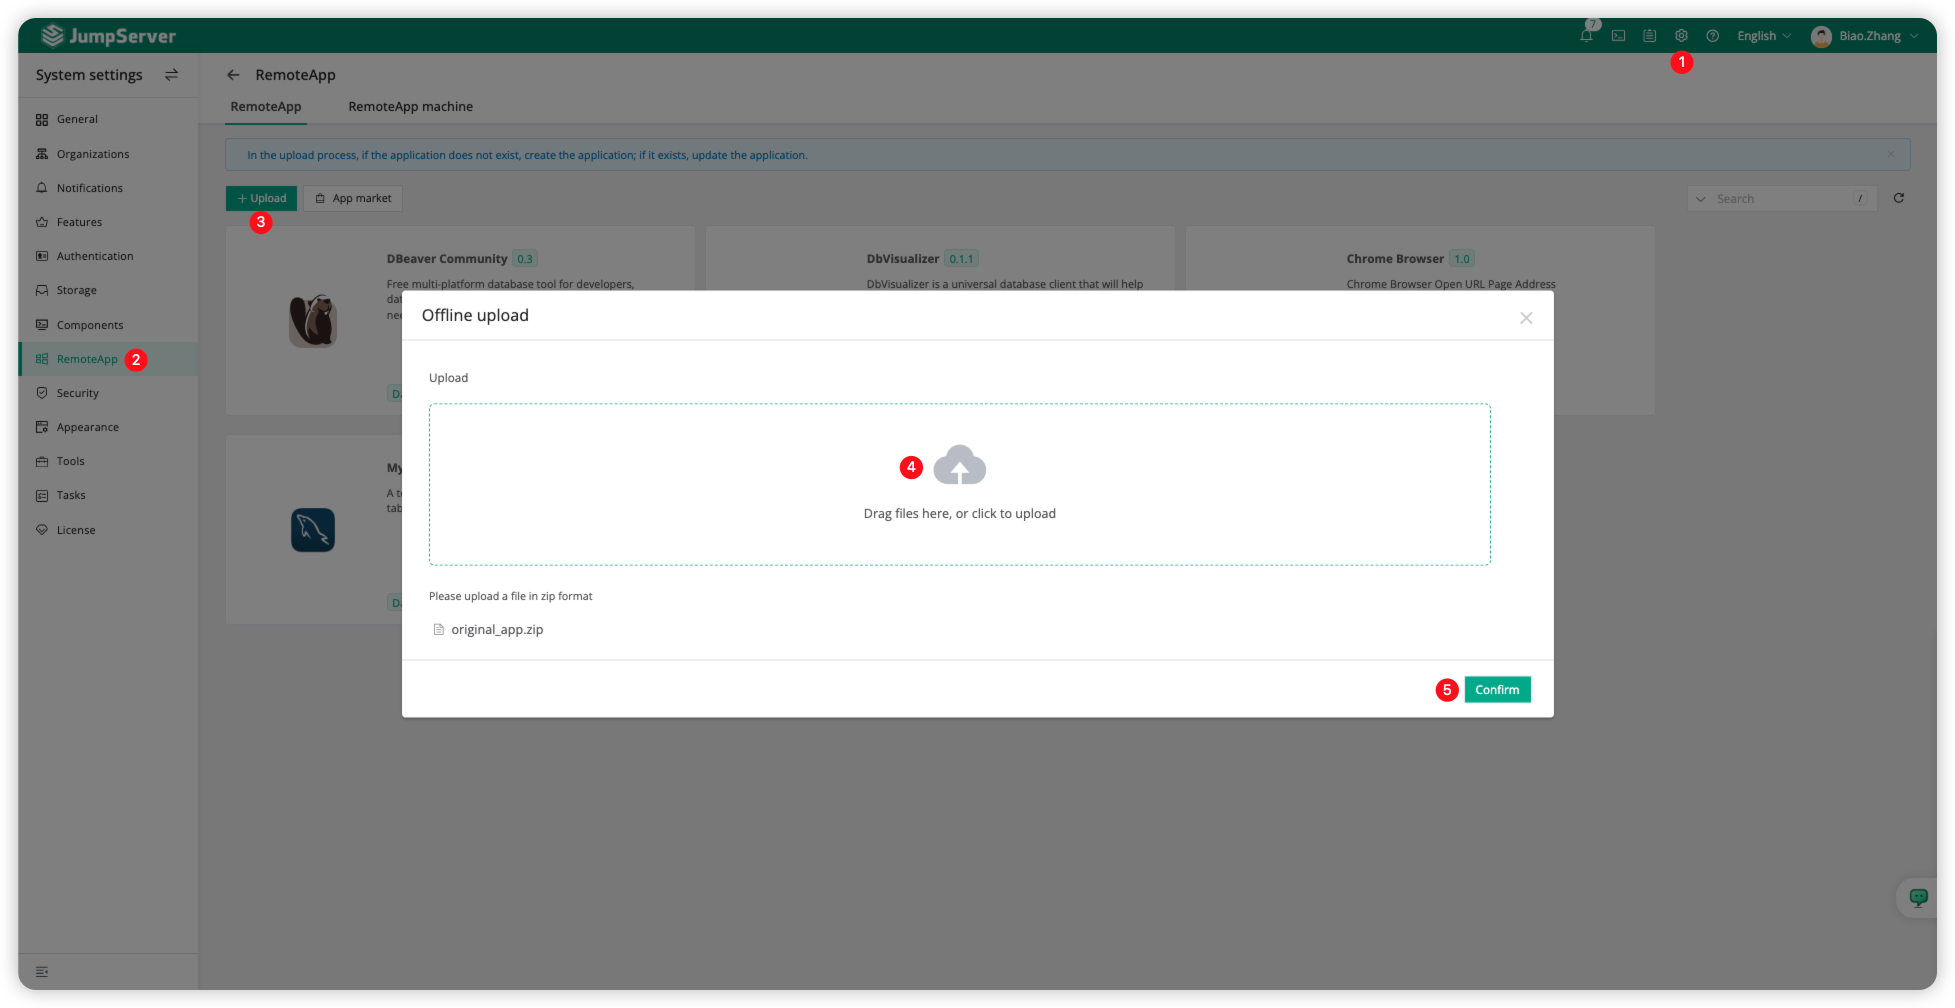
Upload the Original App program package
Switch to JumpServer, click the <gear icon> in the upper right corner of the page to switch to system settings, then click <RemoteApp>, and click the <Upload> button to upload the downloaded program package <original_app.zip>.
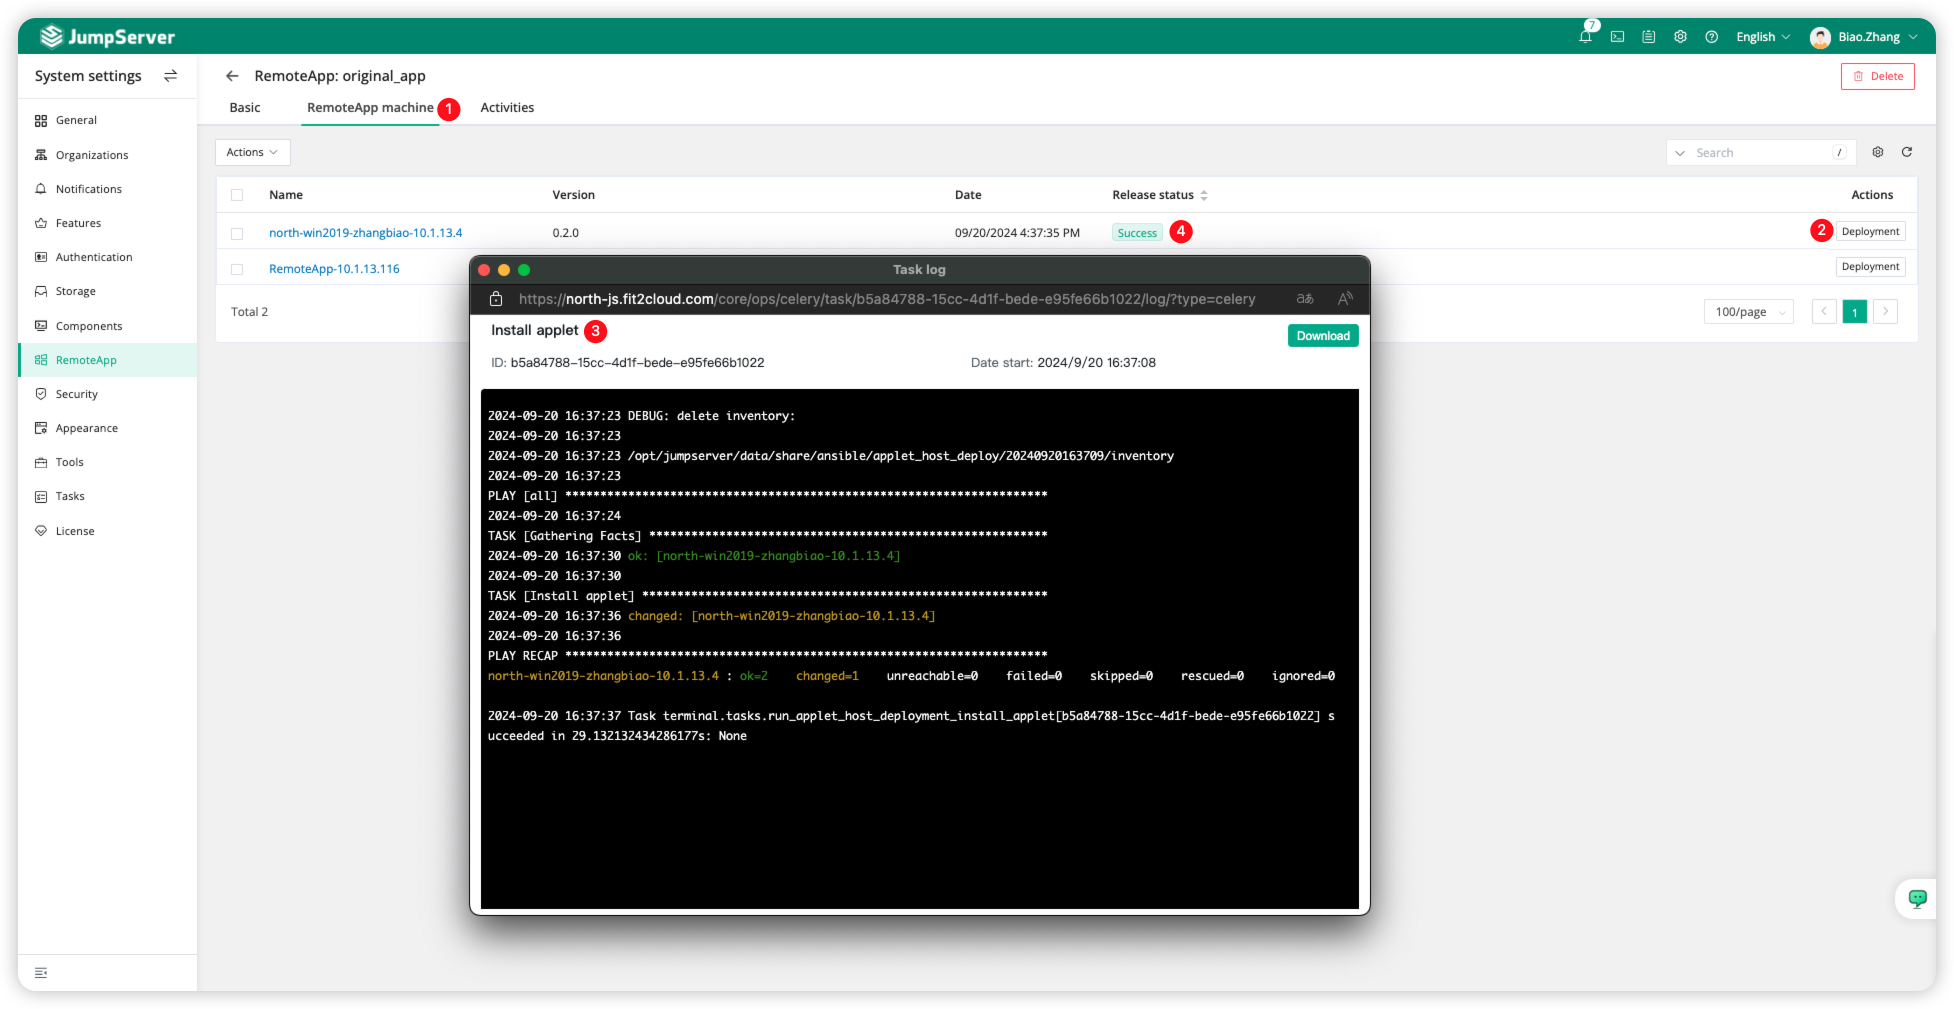
Deploy the Original App
After the <Original App> is successfully uploaded, click the application icon to enter the application details page and switch to <RemoteApp machine>. Select the publishing machine, and click the <Deployment> button to deploy.
After a successful deployment, the Release status is Success.
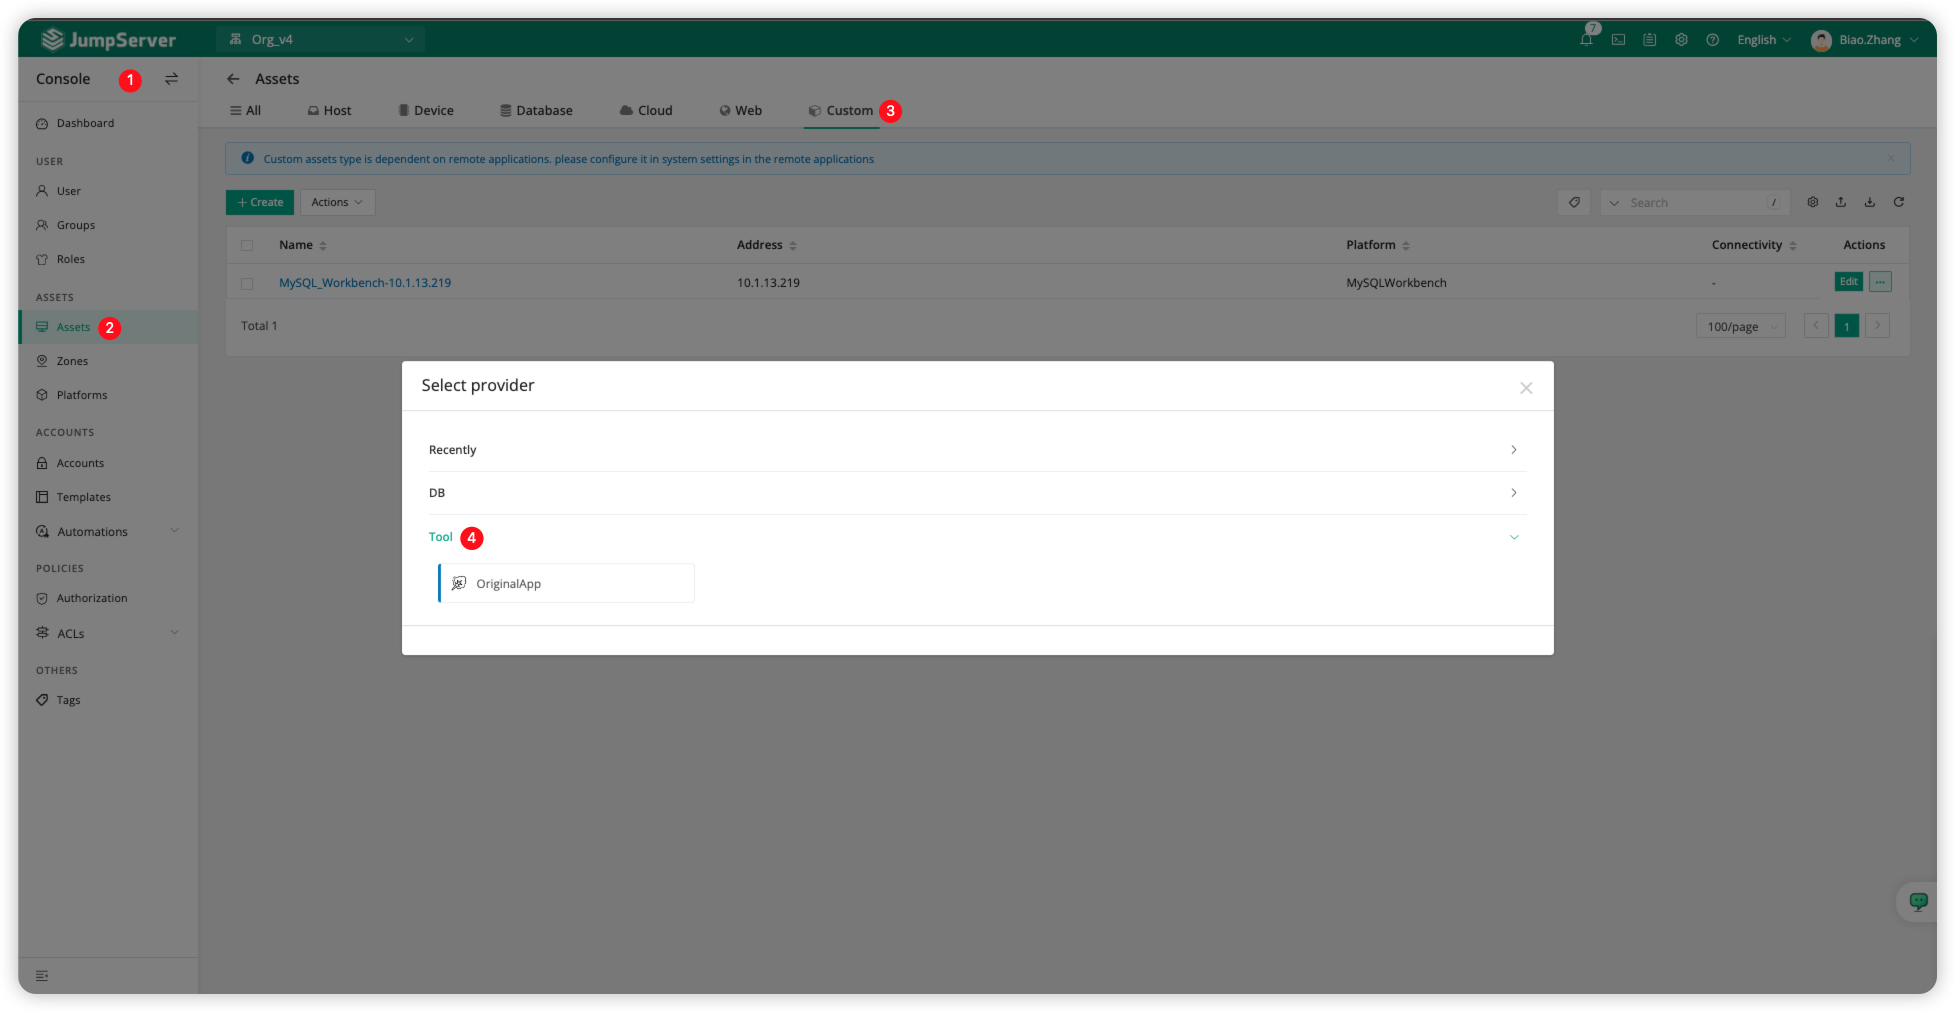
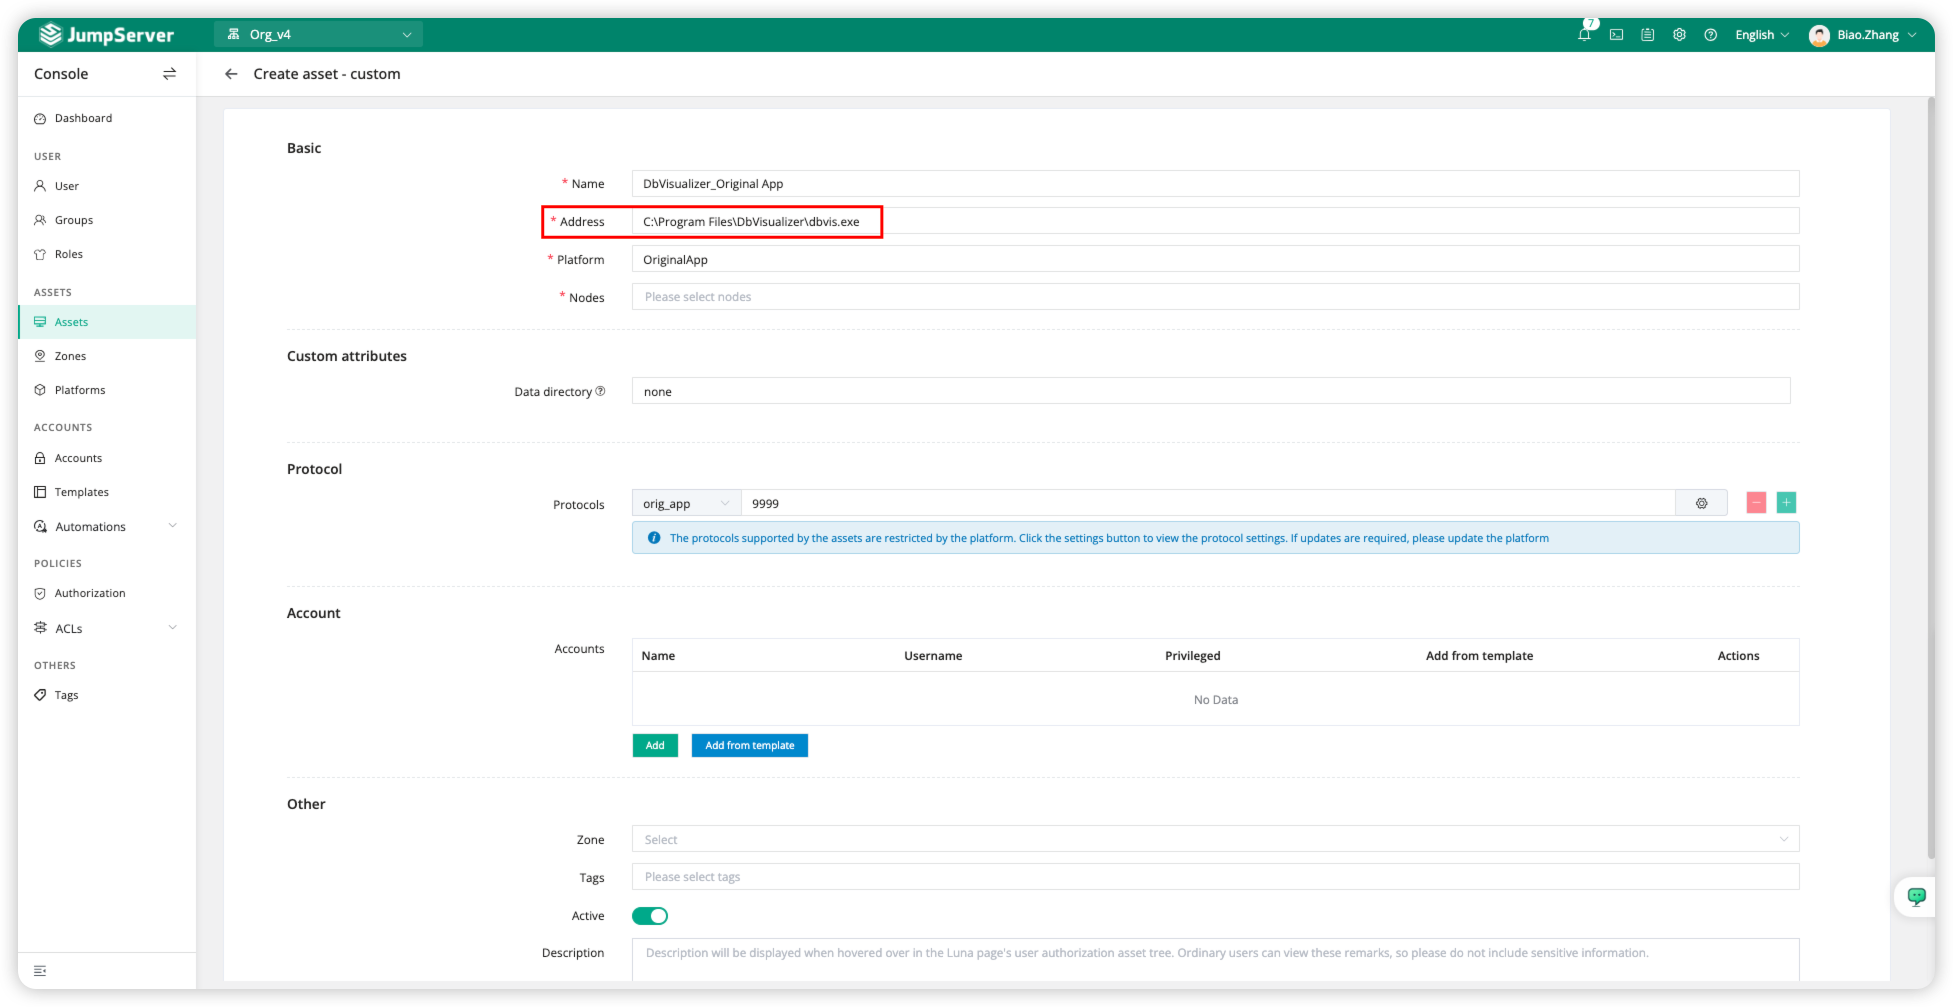
Create custom application assets
In JumpServer, switch to the Console page in the upper left corner, then click <Assets>, click <Custom>, select <Tool>, and then choose the custom category <OriginalApp> platform to create assets.
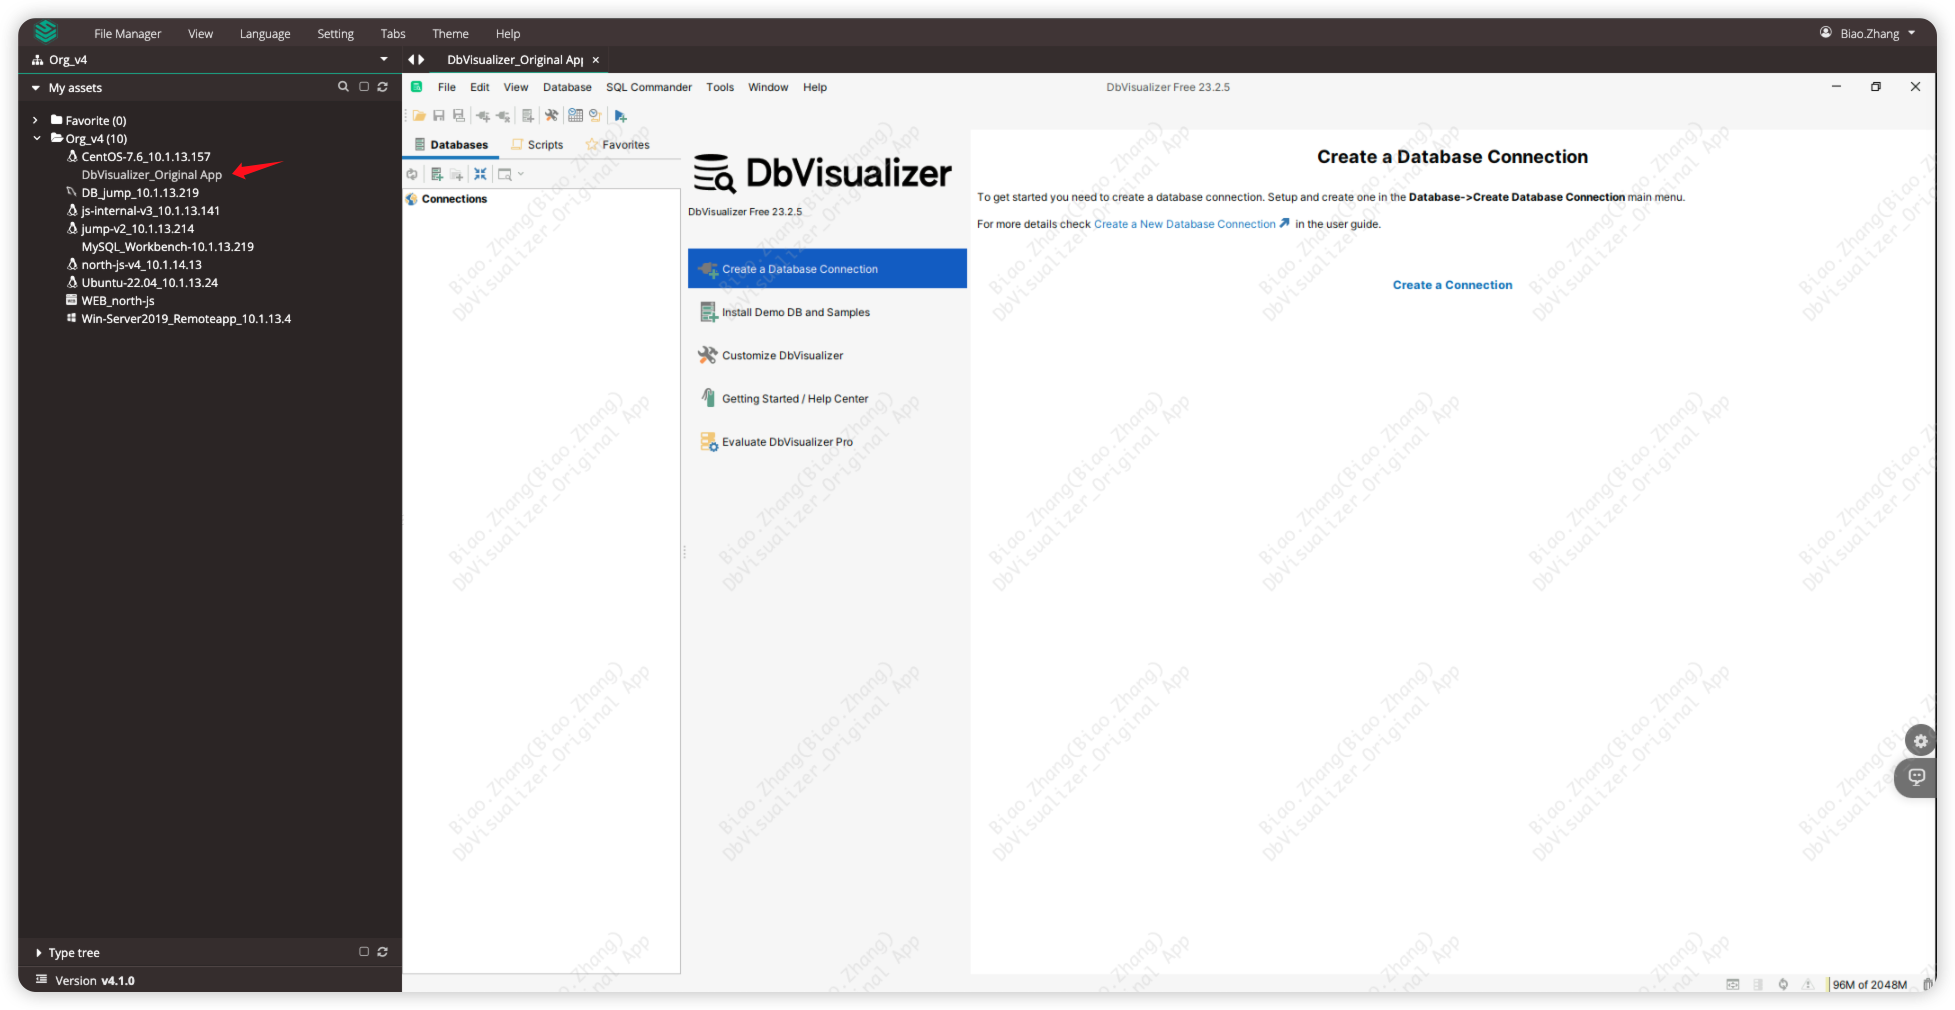
Fill in the custom application asset information, with <Address> as the startup path of the custom application. Here, I will use DbVisualizer as an example.
Note: Protocols have no actual significance in the Original App, so you can ignore them.
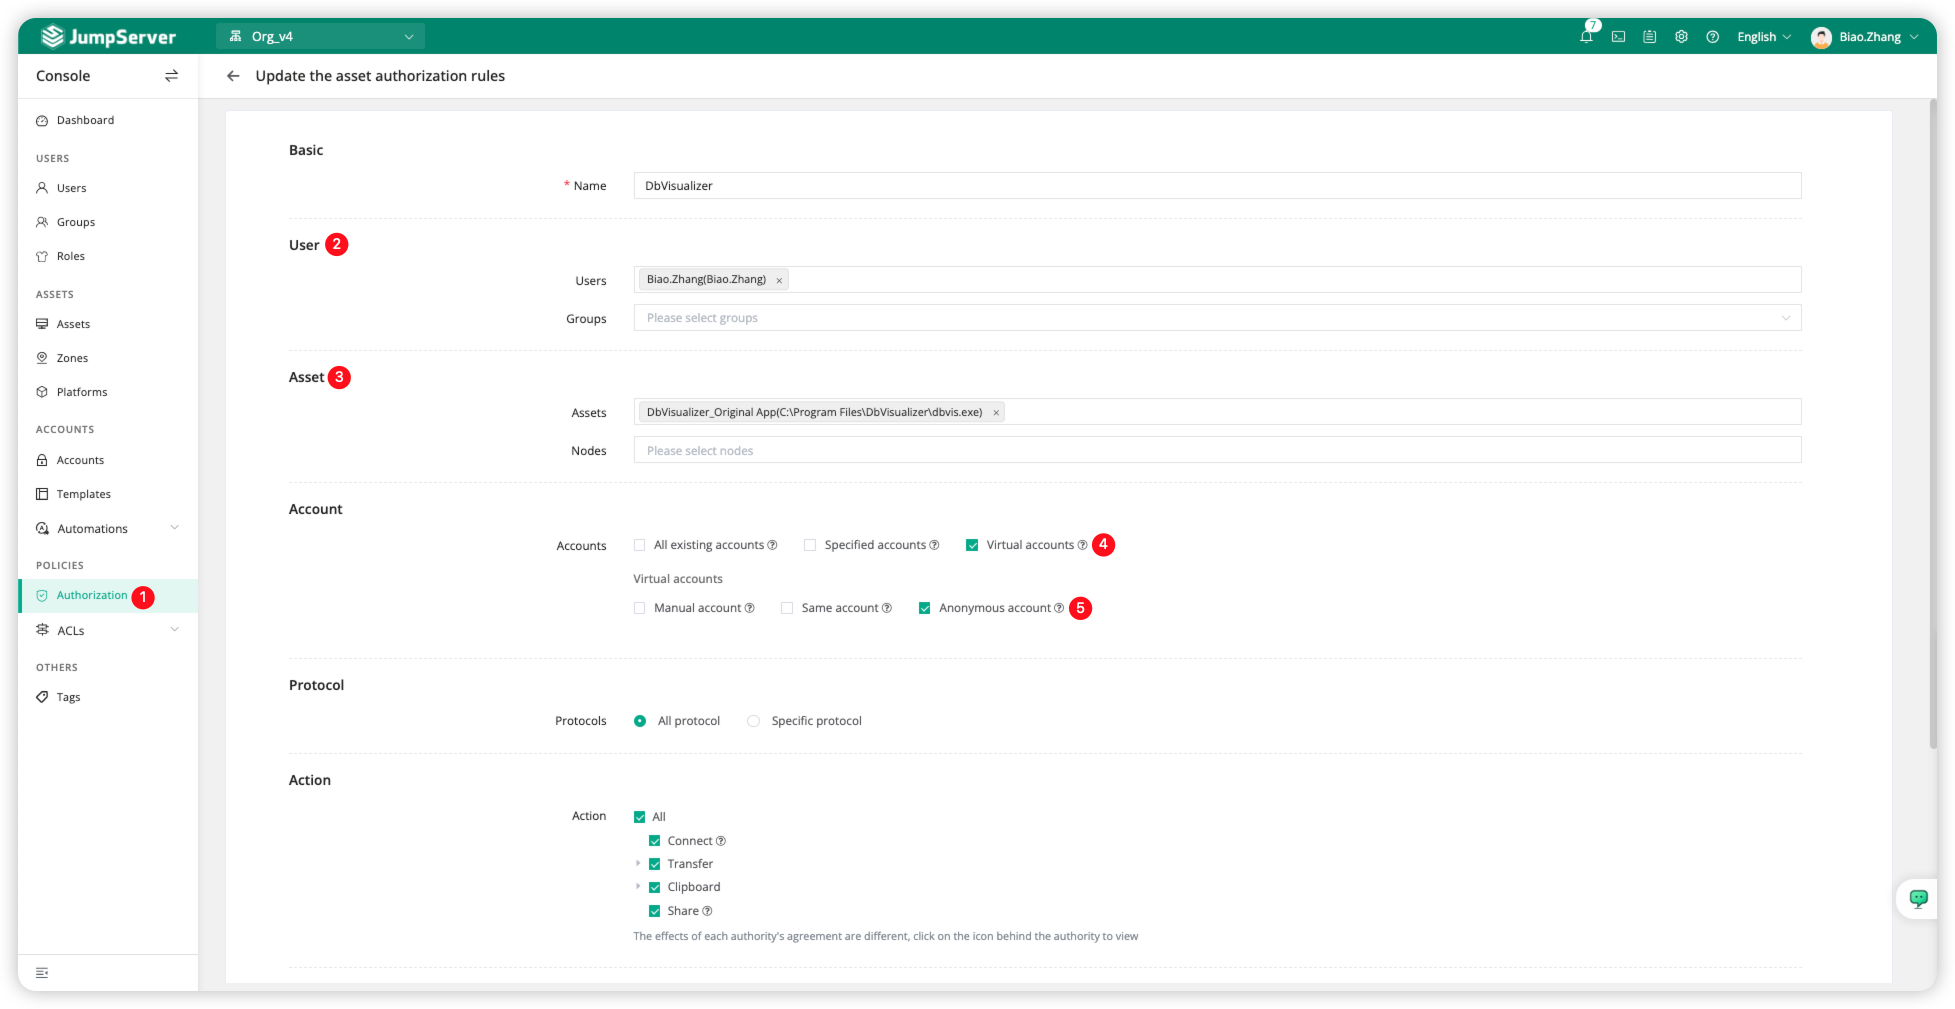
Authorize access to custom application assets
Click <Authorization> to switch to the asset authorization page, then click <Create> to create a new access rule. For User and Assets, select the resource objects we need to authorize, and for Account, choose <Anonymous account> from <Virtual accounts>.
Access the custom application assets
Switch to the Web Terminal page of JumpServer, connect to the custom application assets, and the access effect is shown in the image below.