Scenario Description
In modern enterprises, employees often need to manage multiple online accounts and systems. Frequent input of usernames and passwords is not only time-consuming but also prone to errors, affecting work efficiency. This is especially true when using high-risk systems, as manual entry of credentials increases security risks, potentially leading to password leakage or unauthorized access.
In this context, JumpServer provides an automatic credential filling feature for web resources, allowing users to automatically fill in the appropriate accounts and passwords for login needs in different environments, ensuring both security and convenience. By centrally managing user credentials, JumpServer not only improves login efficiency but also enhances the protection of sensitive information, reducing the security risks associated with manual entry. This way, enterprises can focus more on core business activities, improving overall work efficiency and security capabilities.
Operation Instructions
We will explain the use of Autofill and Element Location.
Autofill
Here are three methods for automatic account and password autofill.
Disabled
The Disabled autofill method is suitable for all web pages. With this method, autofill is not used, and users manually enter their usernames and passwords after accessing the web asset.
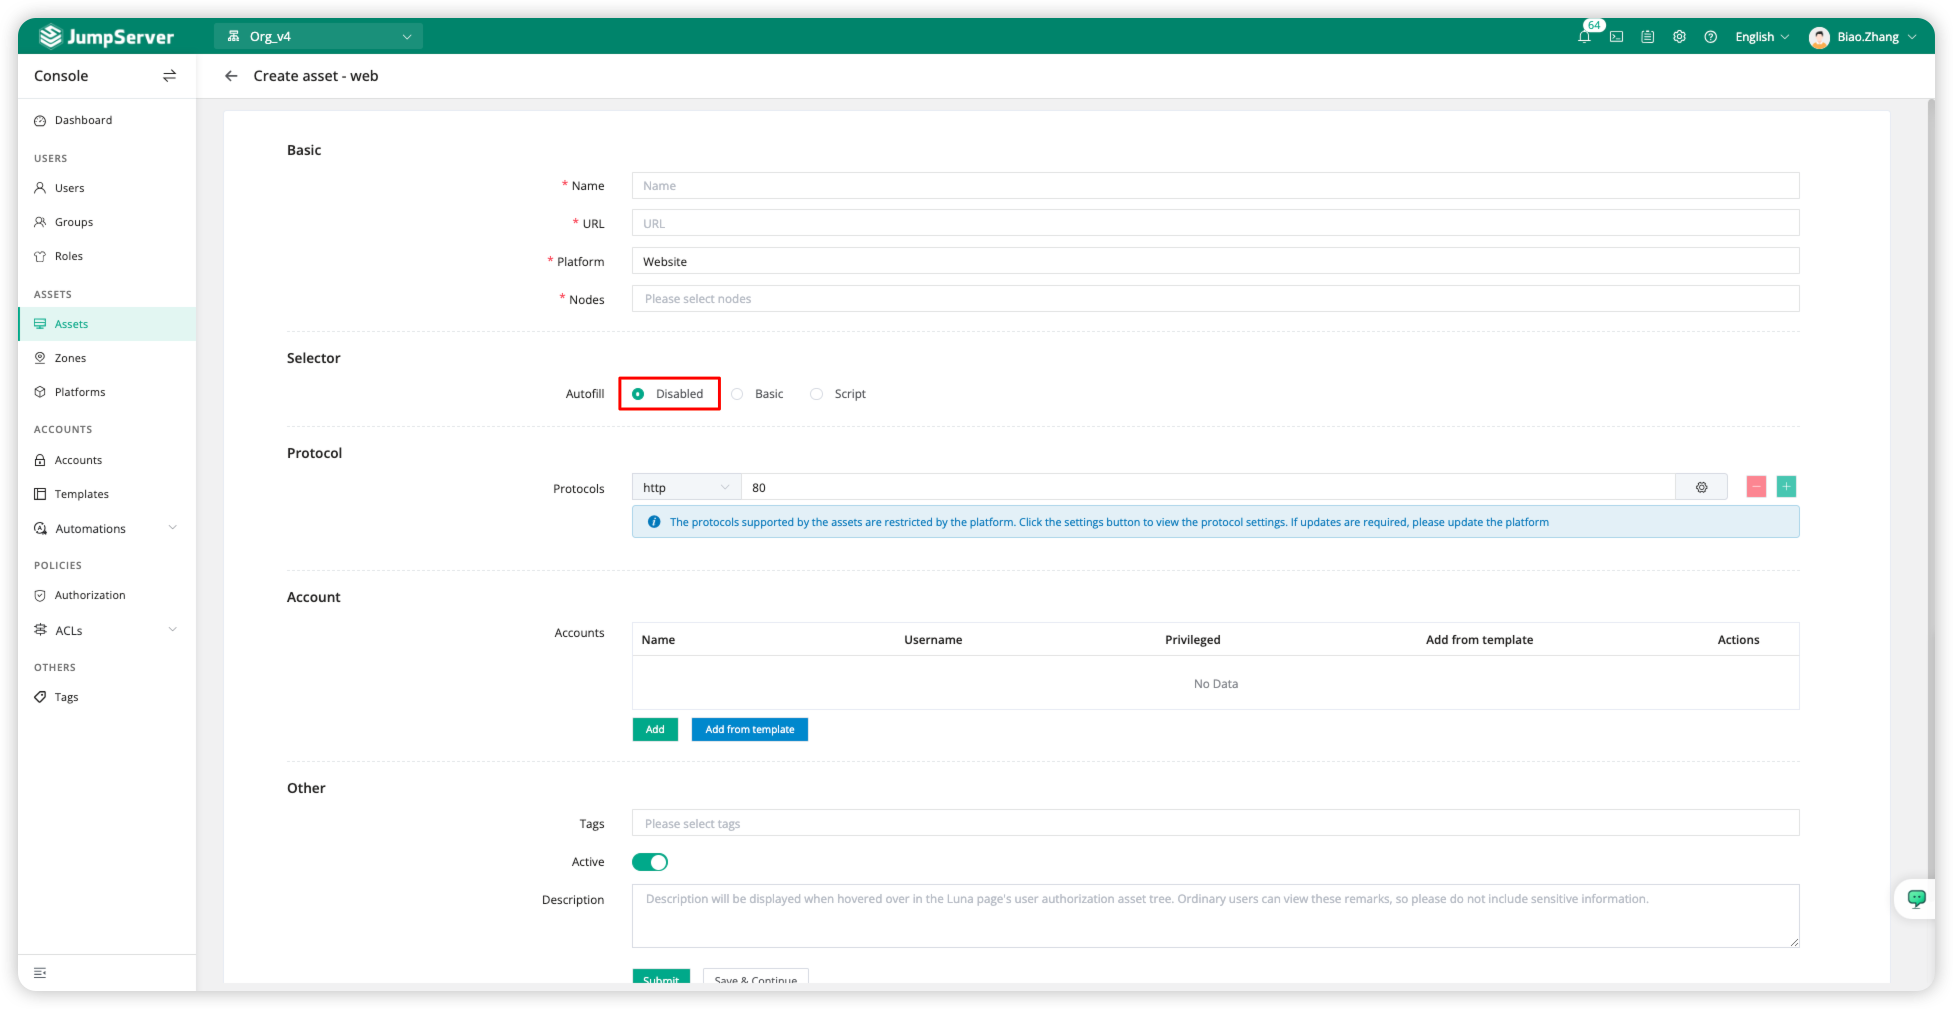
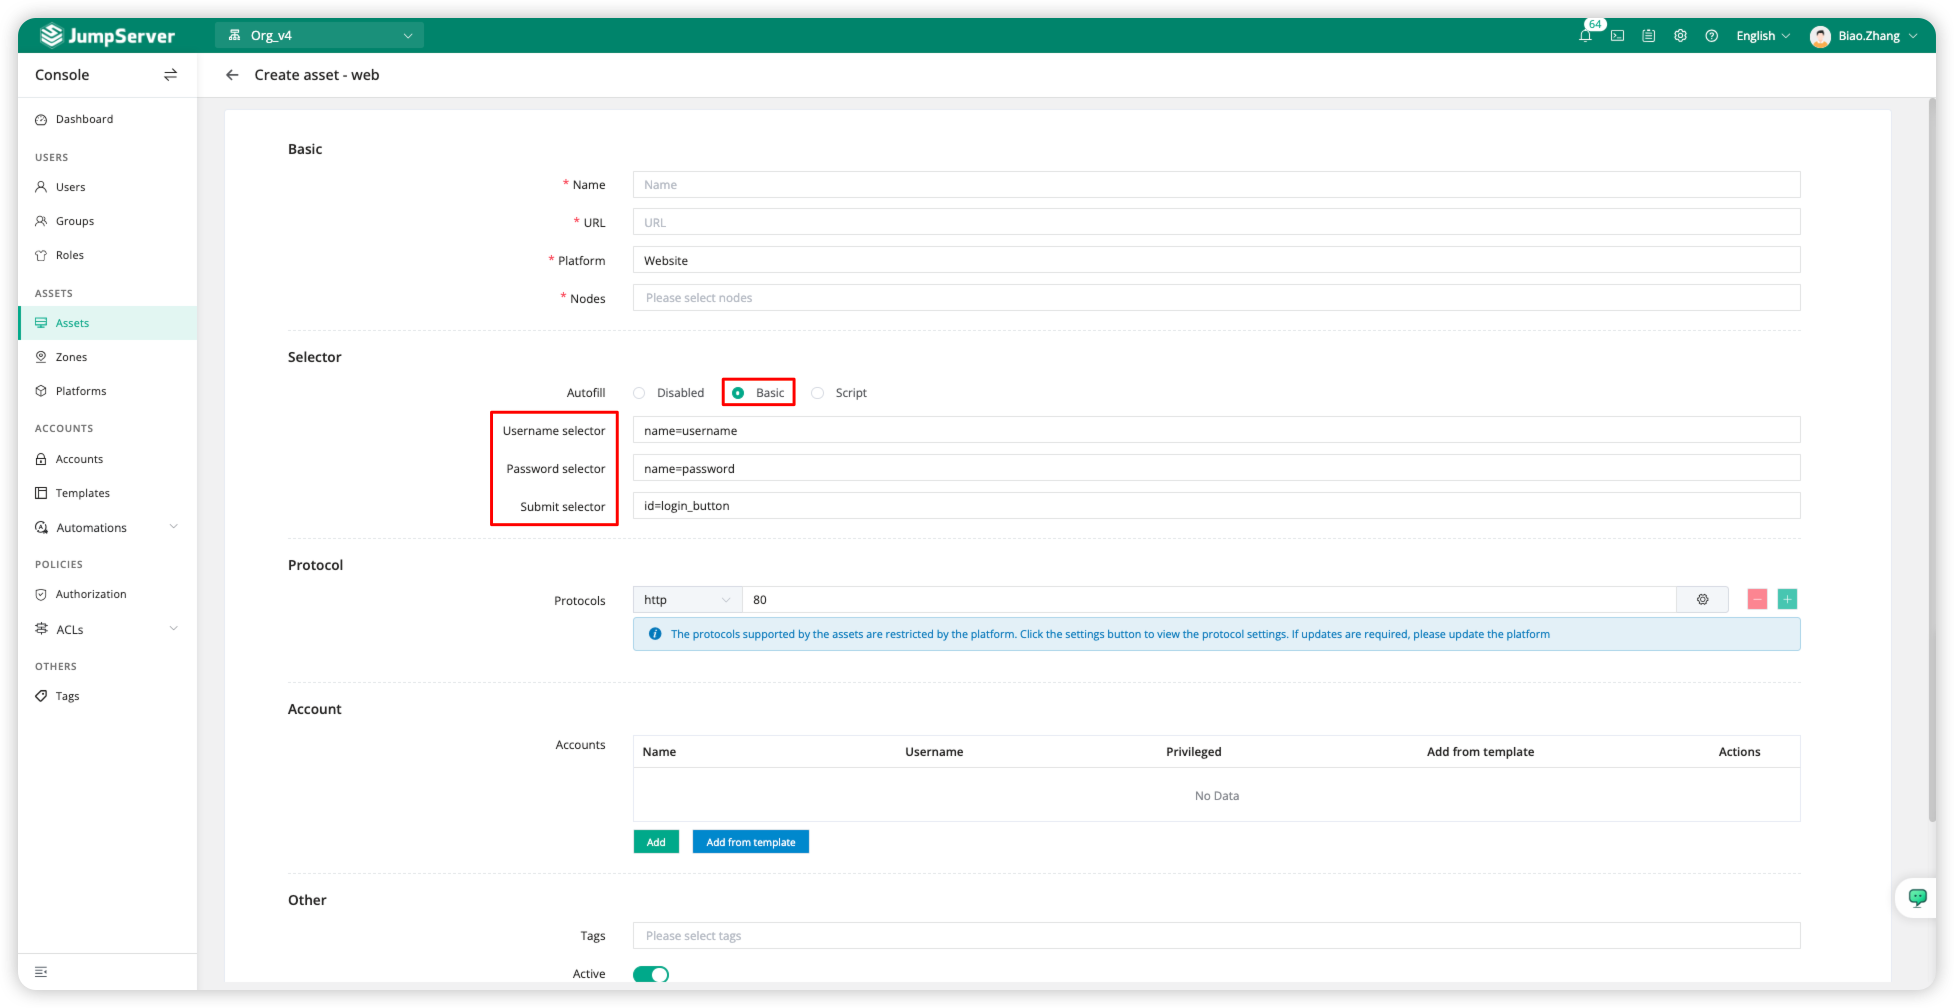
Basic
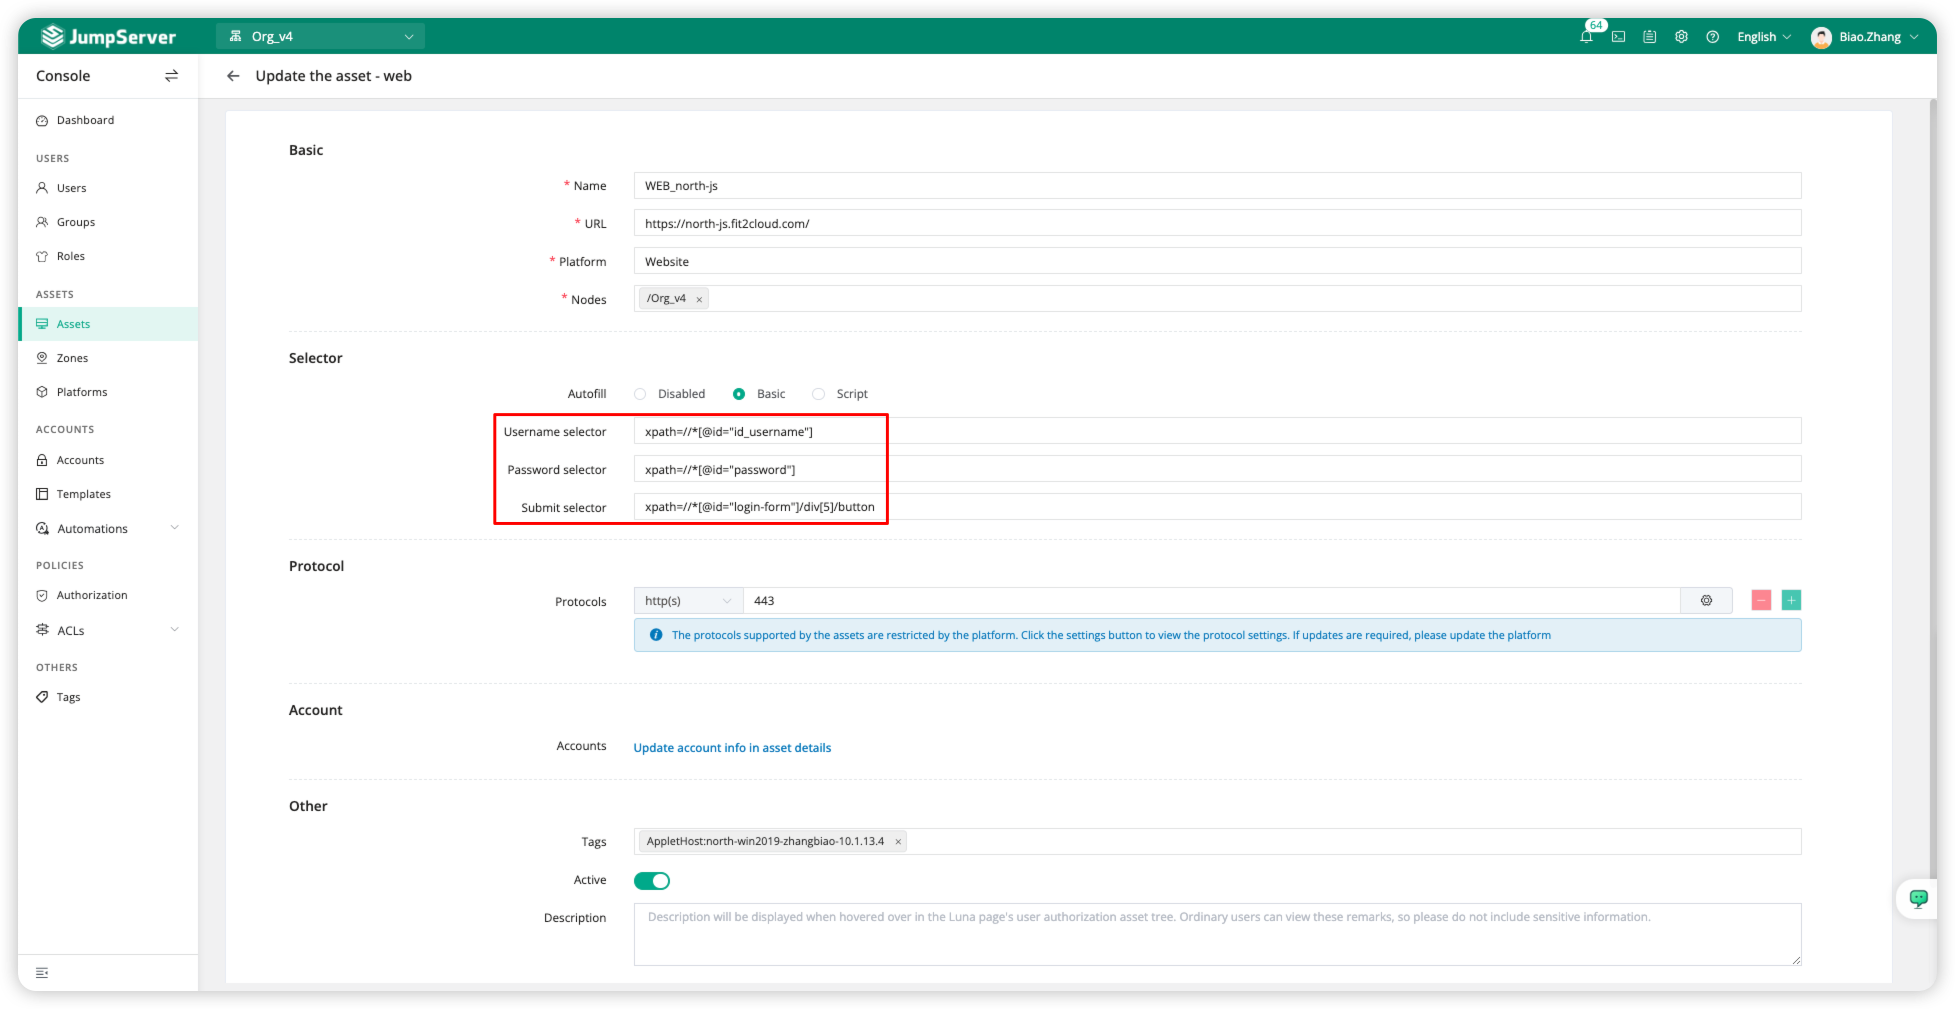
The Basic autofill method is suitable for login pages that include a username, password, and login button for accessing web pages. The Basic method provides the most basic autofill for login pages, including the username, password, and login button, and it can fill in the fields based on element location.
The configuration of parameters can refer to element location.
The auto-fill feature requires configuring the Account, where the username and password for the web page are filled in.
Script
The Script autofill method is suitable for all web pages. Script autofill is designed to accommodate complex login logic by writing deployment scripts in list format using JSON, enabling the autofill of account credentials.
The auto-fill feature requires configuring the Account, where the username and password for the web page are filled in.
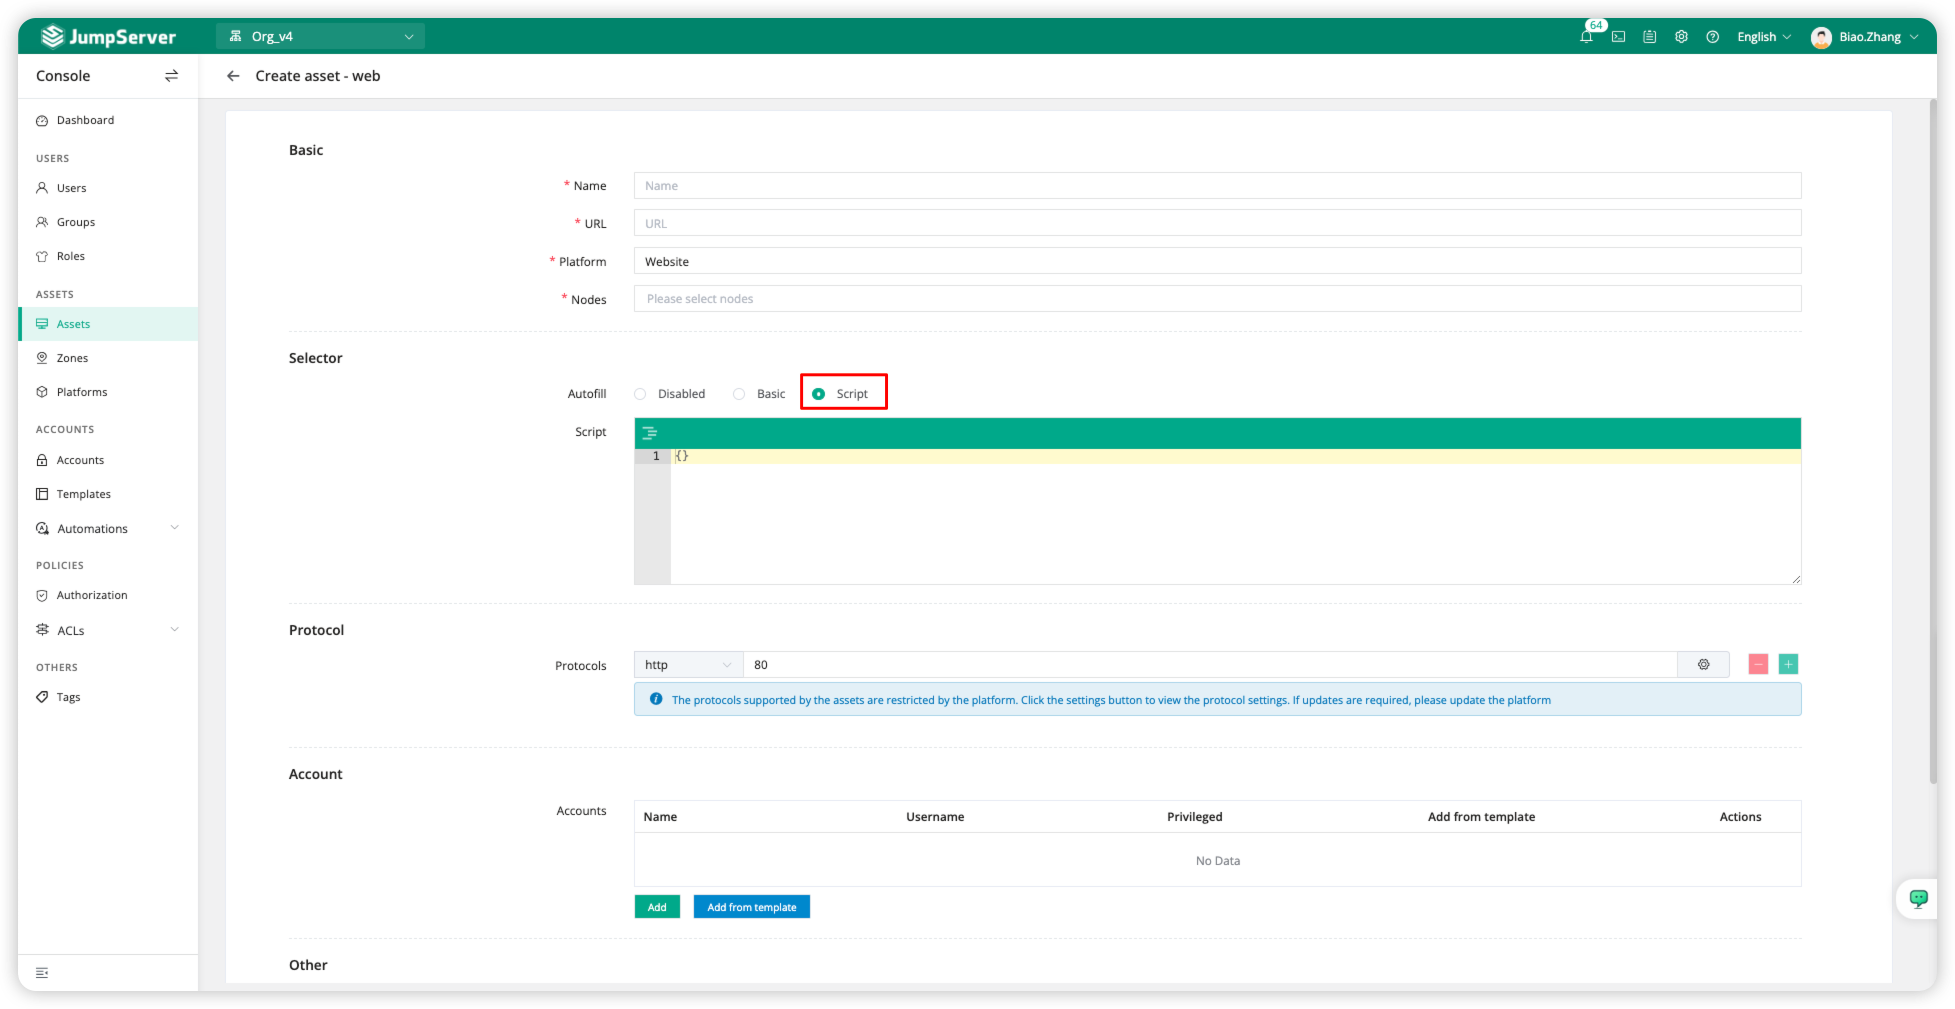
Autofill script example:
[
  {
    "step": 1,
    "value": "{USERNAME}",
    "target": "name=accessKey",
    "command": "type"
  },
  {
    "step": 2,
    "value": "{SECRET}",
    "target": "name=secretKey",
    "command": "type"
  },
  {
    "step": 3,
    "value": "",
    "target": "id=do-login",
    "command": "click"
  }
]
Script field explanation:
step: The execution order of the script, primarily using numbers.
value: The value to be entered at this step.
{USERNAME}refers to the username in the account, and{SECRET}refers to the password.target: The tag selector used at this step. The target tag selector references element location, with syntax similar to:
name=xxxx,id=xxxx,css=xxxx,xpath=xxxx.command: The action executed at this step,type: Input the value,Click the button.
Element location
JumpServer is based on Selenium's Python scripts to automate the login to web assets using the Chrome browser. For automatic login to web assets, the program needs to autofill the username and password, which can be broken down into three actions:
Input username
Input password
Click the login button.
Based on this, when creating a web asset, you need to fill in the corresponding labels for the username, password, and login. During login, Selenium controls the Chrome browser to execute the following default actions:
Find the username input tag and enter the account username.
Find the password input tag and enter the account password.
Find the login button and click it.
The autofill method uses element-based tag searches, requiring the identification of the corresponding elements. There are multiple ways to locate elements, and JumpServer currently supports the following methods:
ID: Based on the element's attribute.
Name: Based on the element's attribute.
CSS: Based on the selector.
Xpath: Based on the element's path.
Note: Currently, JumpServer does not support autofilling for automated CAPTCHA challenges.
Here is an example of XPath-based element locating (XPath method, used to match xpath=××××××××):
Switch to the browser web page and open the browser console by pressing F12. As shown in the image below, locate the desired element.
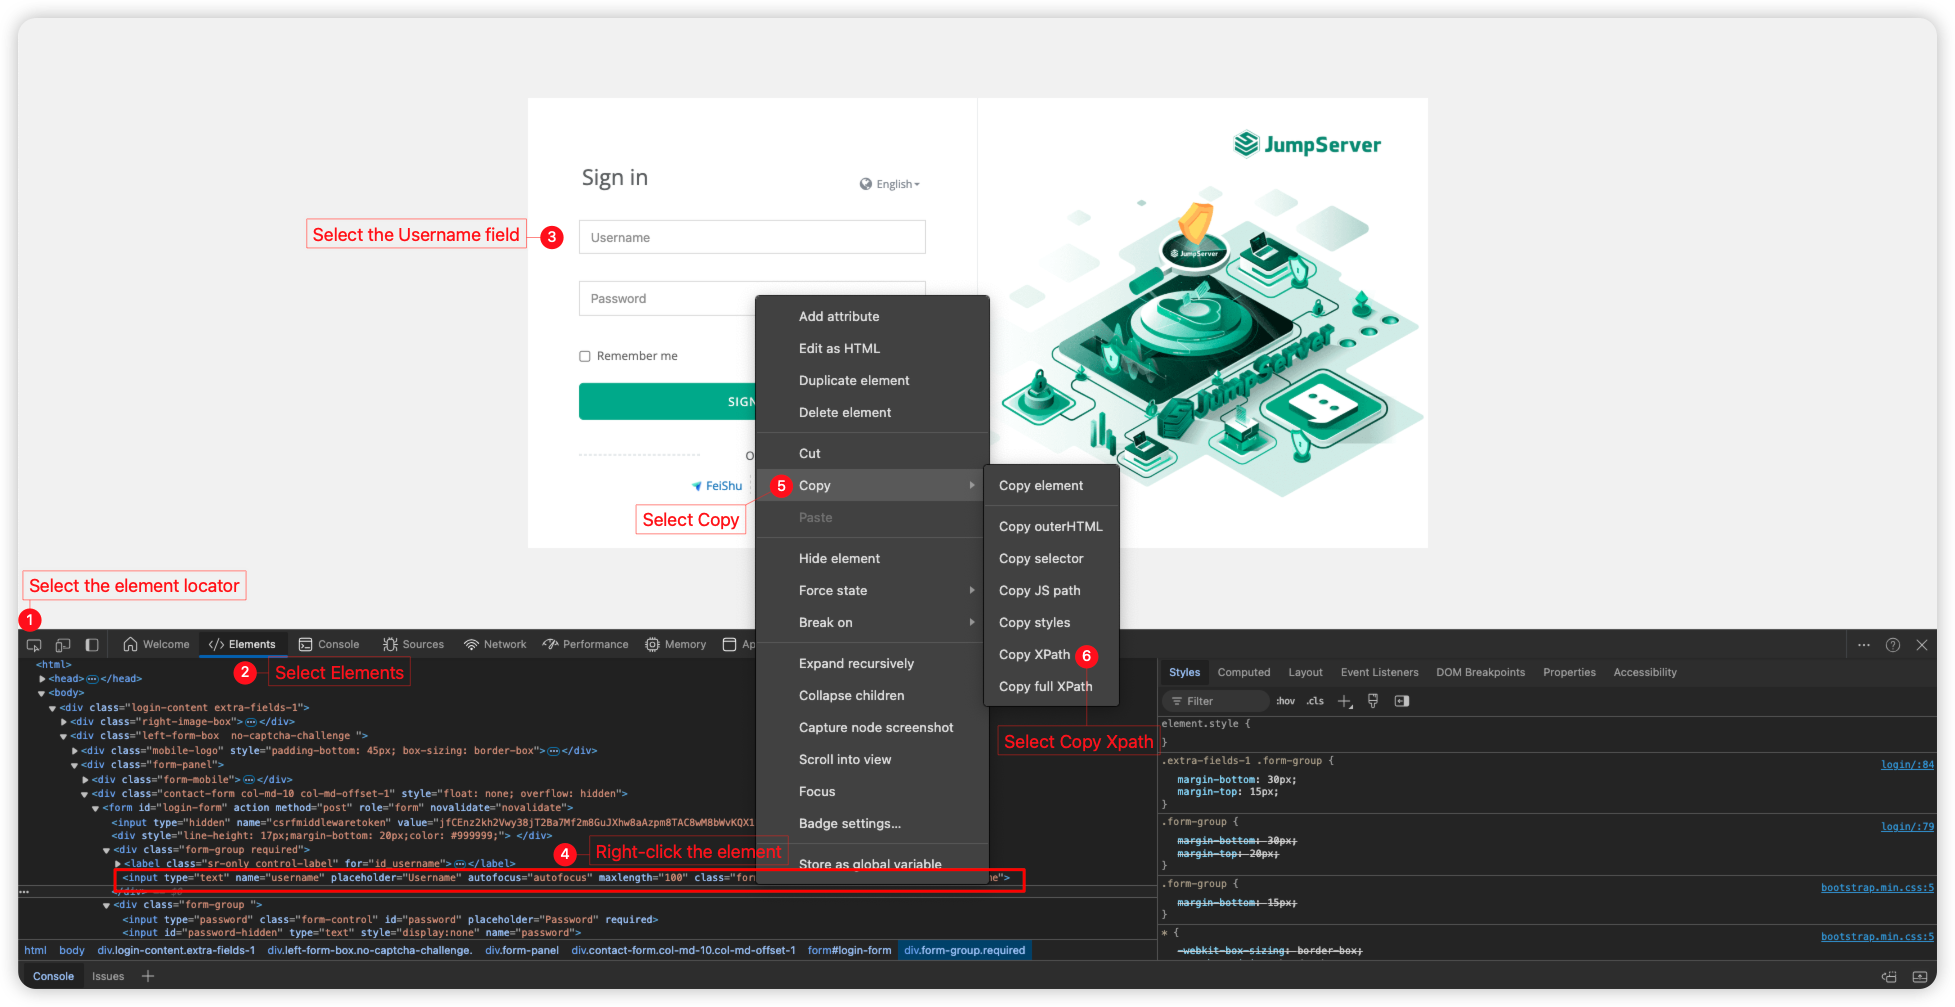
Obtain Username, Password, and Submit in sequence, resulting in the final output as shown in the image below.
Function Verification
When accessing the web resource, there is no need to enter the username and password to log in to the webpage.