Overview
This article primarily introduces the storage location of video files, the logic of video preservation, the configuration of external storage for video recording, and the playback of video files.
Introduction to the video files of JumpServer
The storage directory for video files
The storage directory for video files cannot be modified; only the primary configuration directory can be adjusted.
If it is necessary to change the storage directory for video files, the entire persistent directory of JumpServer needs to be adjusted.

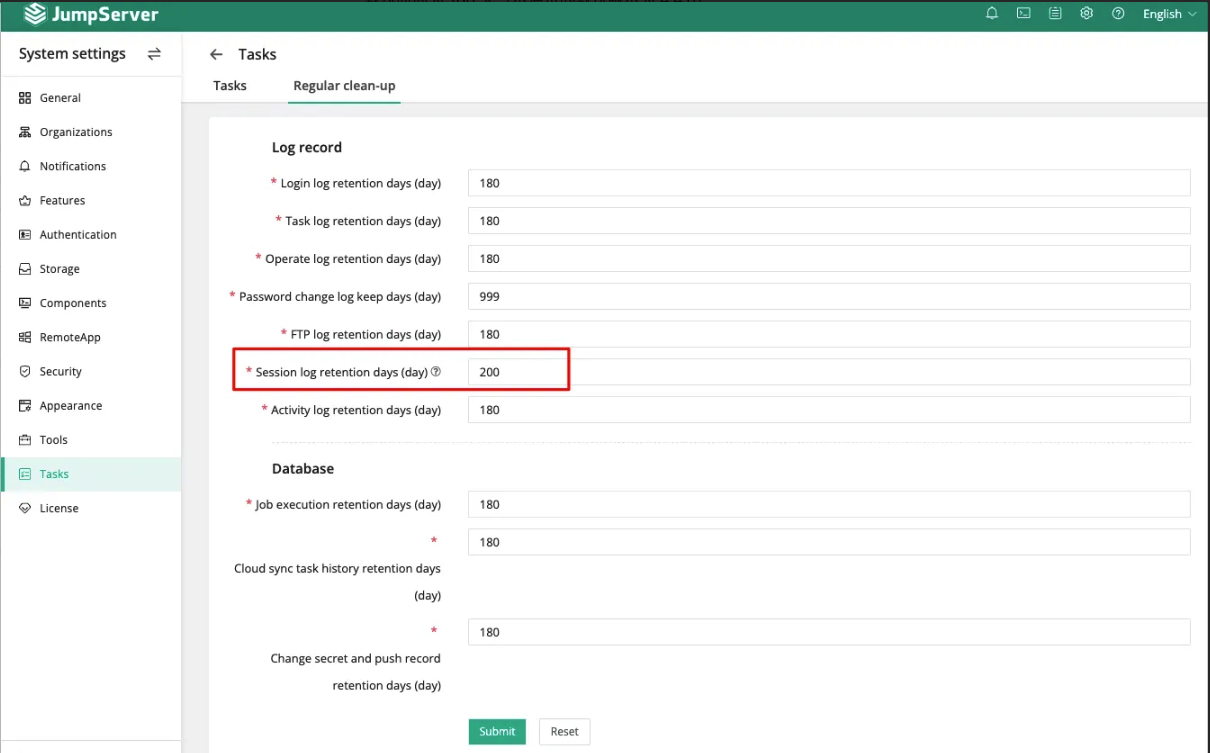
Video Retention Time Settings
The default time is 180 days (the default version demonstrated here is 4.4.0).
The configuration directory is: "System Settings" → "Regular Cleanup" → "Session Log Retention Time". This retention time does not affect the retention time of external storage (e.g., OBS).
The process of generating JumpServer video files
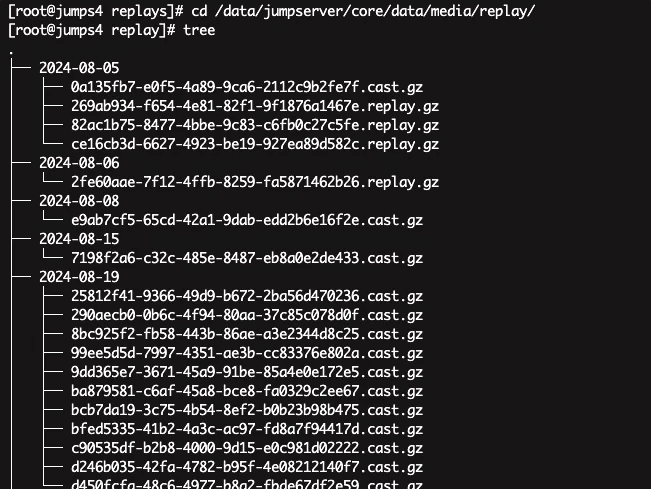
All successfully uploaded videos are saved here: /data/jumpserver/core/data/media/replay
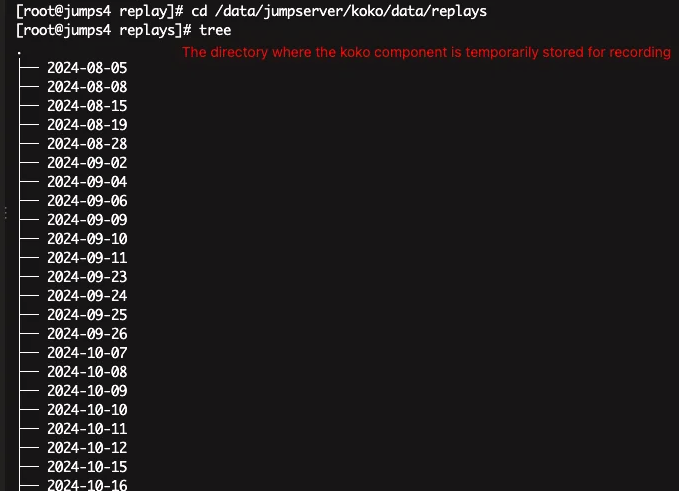
SSH protocol
Linux first generates video recordings in the /data/jumpserver/koko/data/replays directory, compresses them, and then uploads them to the core's video storage path, after which they are deleted locally.
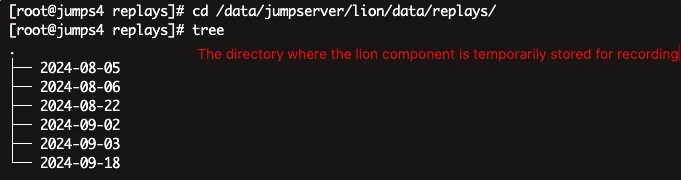
RDP protocol(Web GUI)
The video recording files generated from accessing Windows through a browser are first stored in the /data/jumpserver/lion/data/replays/ , compresses them, uploads them to the core's video storage path, and then deletes them locally.
other protocal
rdp protocol(xrdp component ):The video recording files generated from accessing Windows through a browser are first stored in the /data/jumpserver/xrdp/data/replays/ directory, uploaded to the core's video storage path, and then deleted locally. Tips:The xrdp component connection method for Windows is an alternative to the Web GUI approach, which requires configuration through terminal rules. The Web GUI defaults to using the lion component for connections.
rdp protocol(razor component):The recordings of connections to Windows using the razor component arefirst stored in /data/jumpserver/razor/data/replays/ directory, uploaded to the core's video storage path, and then deleted locally. Tips:The enterprise version of JumpServer offers a client-based method for connecting to Windows, which is a more enhanced RDP (Remote Desktop Protocol) connection experience.
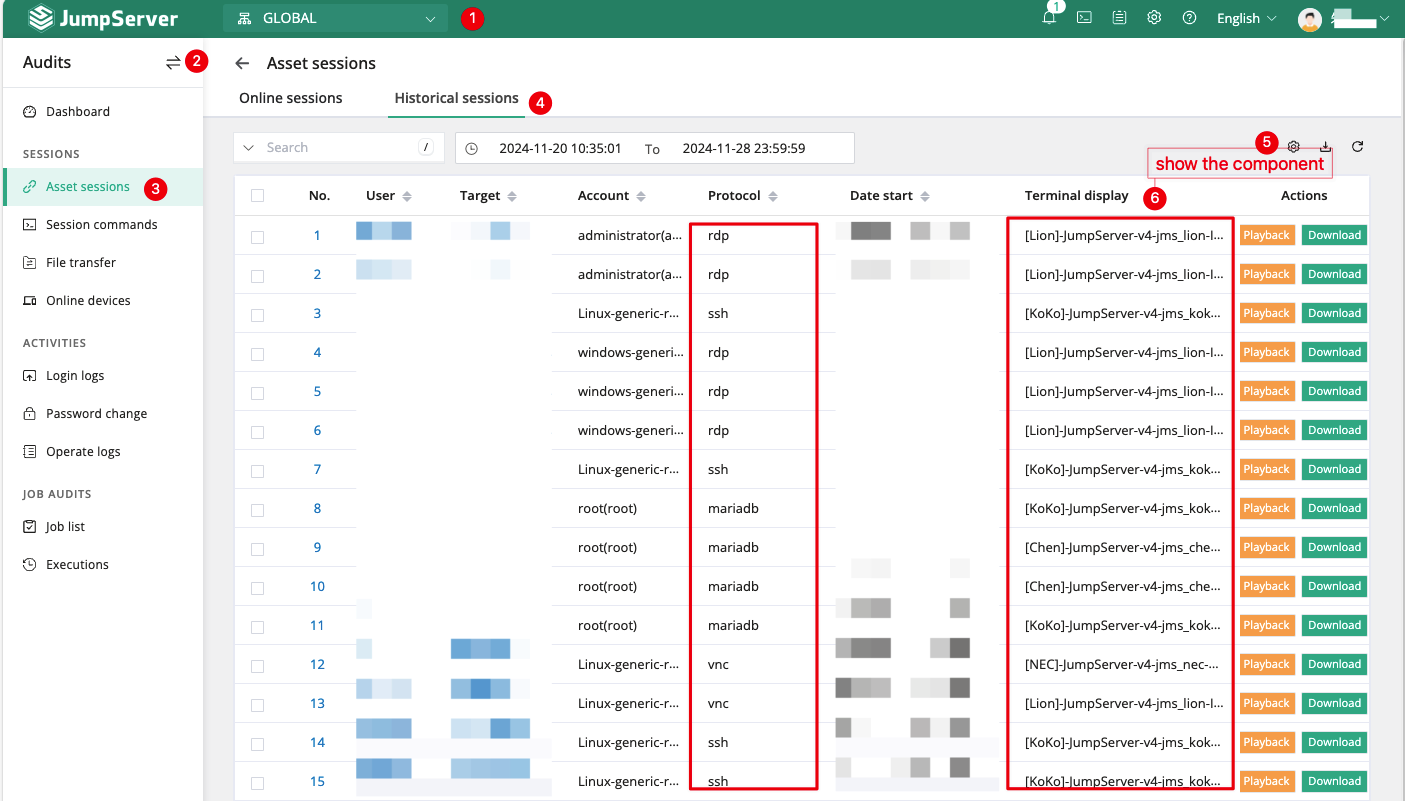
As mentioned above, the video processing method for other components is similar: it caches the recordings locally within the component before uploading them uniformly to the core component. We have a convenient way to check the connection methods for the corresponding components, which you can refer to in the following screenshots. Note that you need to open the gear icon on the right to filter out the unnecessary options.
Configuring External Storage for Video Recordings
JumpServer currently supports the following external video storage options: S3, Ceph, Swift, OSS, Azure, OBS, and COS.
This article takes a self-built MinIO as an example.
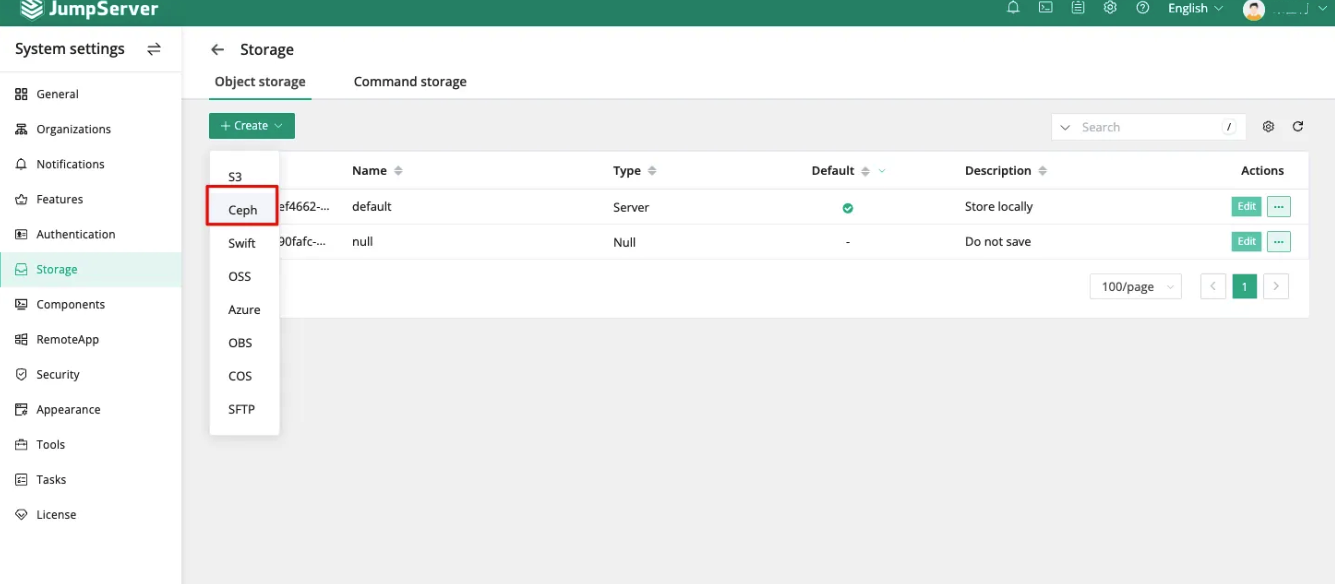
Click on "System Settings" → "Storage" → "Object Storage". Click "Create" → "Ceph".
Enter the specific configuration information to set up.
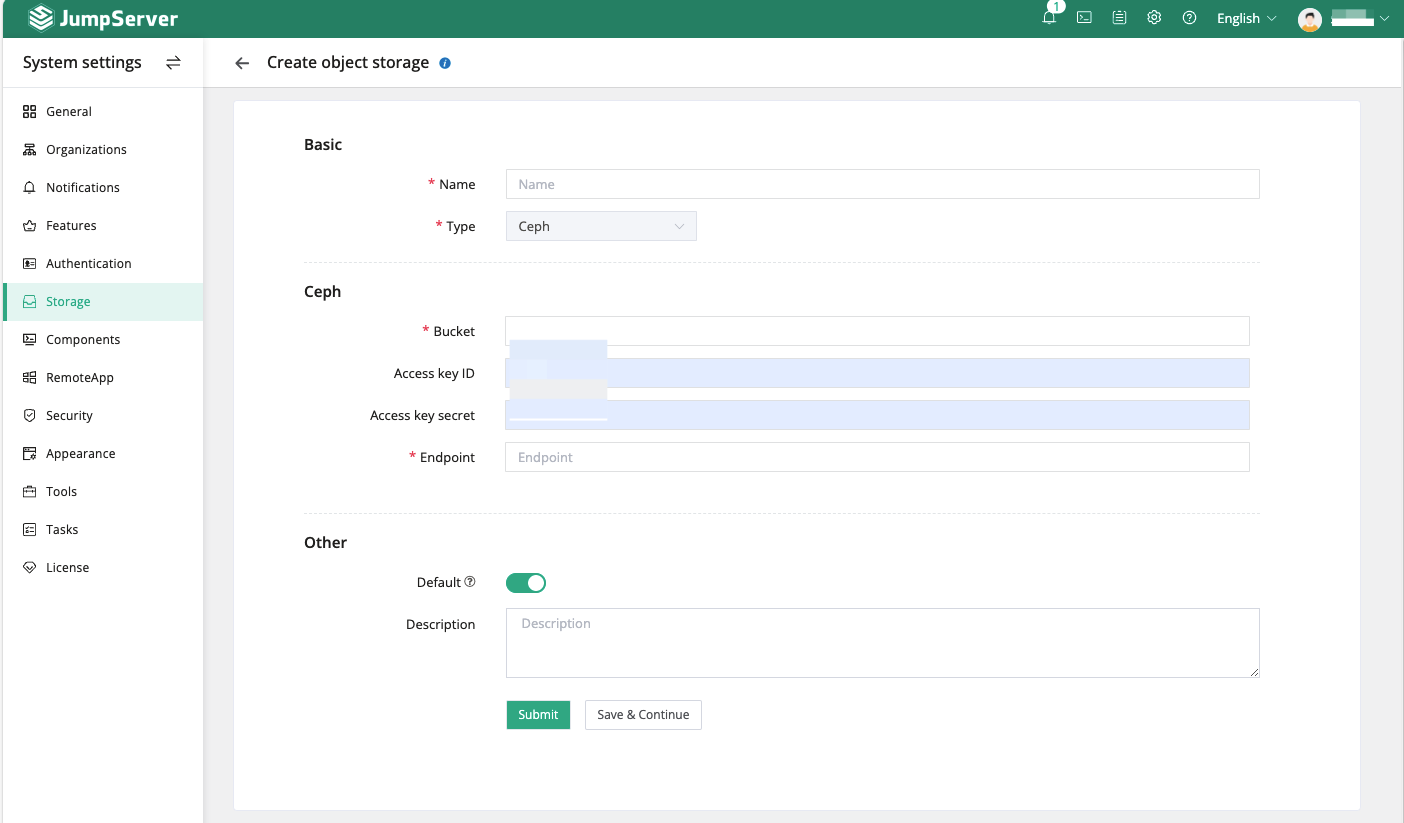
Submit the configuration.
Click on "System Settings" → "Components" → "Components". Update the video storage for each component to the newly created external storage.
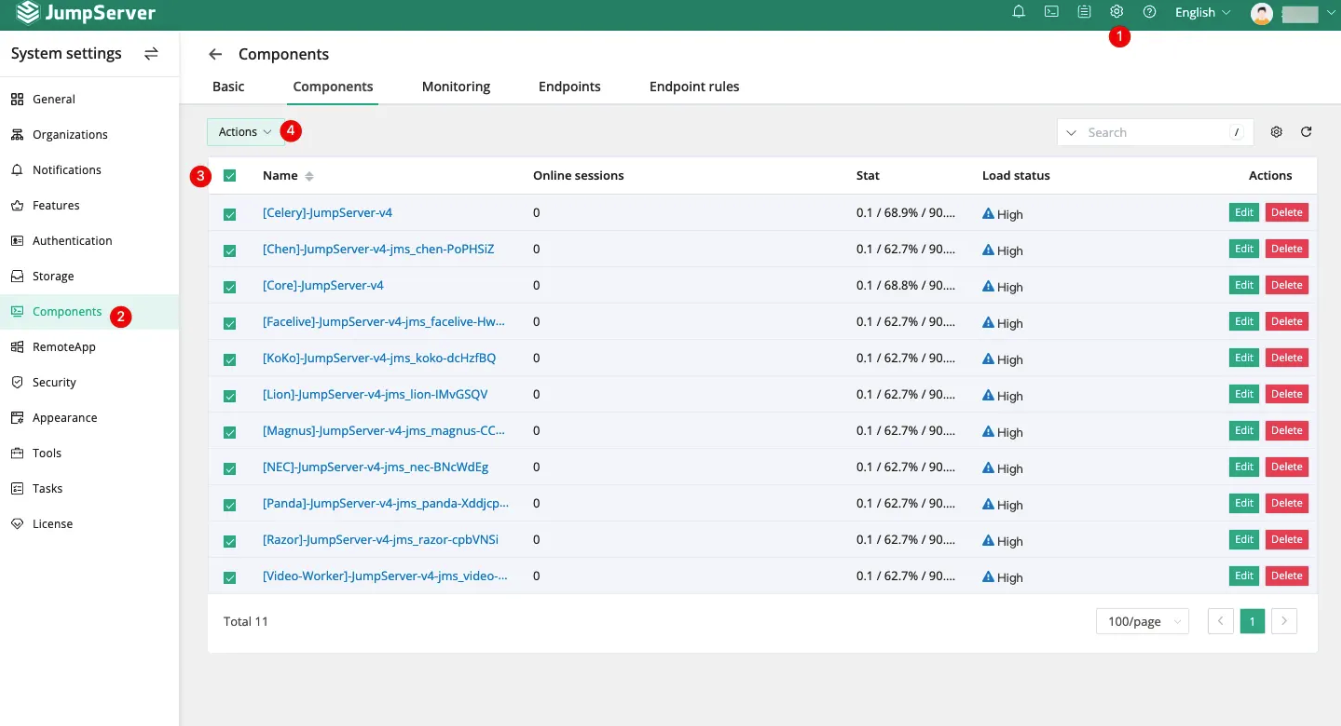
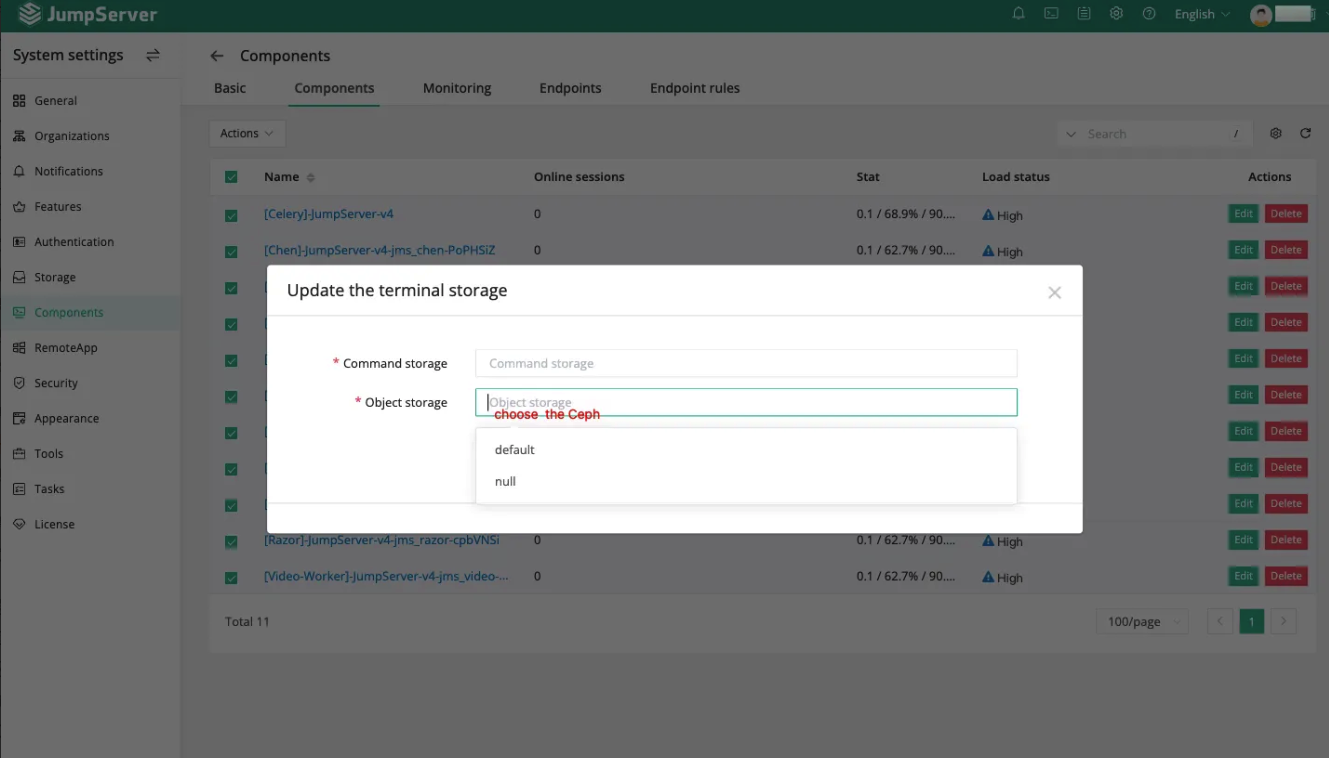
Submit the changes.
Tips:Videos stored in external storage:
When playing, the video will first be downloaded to the server (not the user's local machine).
The video will not be deleted after playback is completed. (There will be a copy of the video file both locally and in OSS)
The browser caches the video parsing address from the server.
Playing Video Files
Audit videos can be viewed online or downloaded and played in JumpServer's dedicated player.
Online Playback
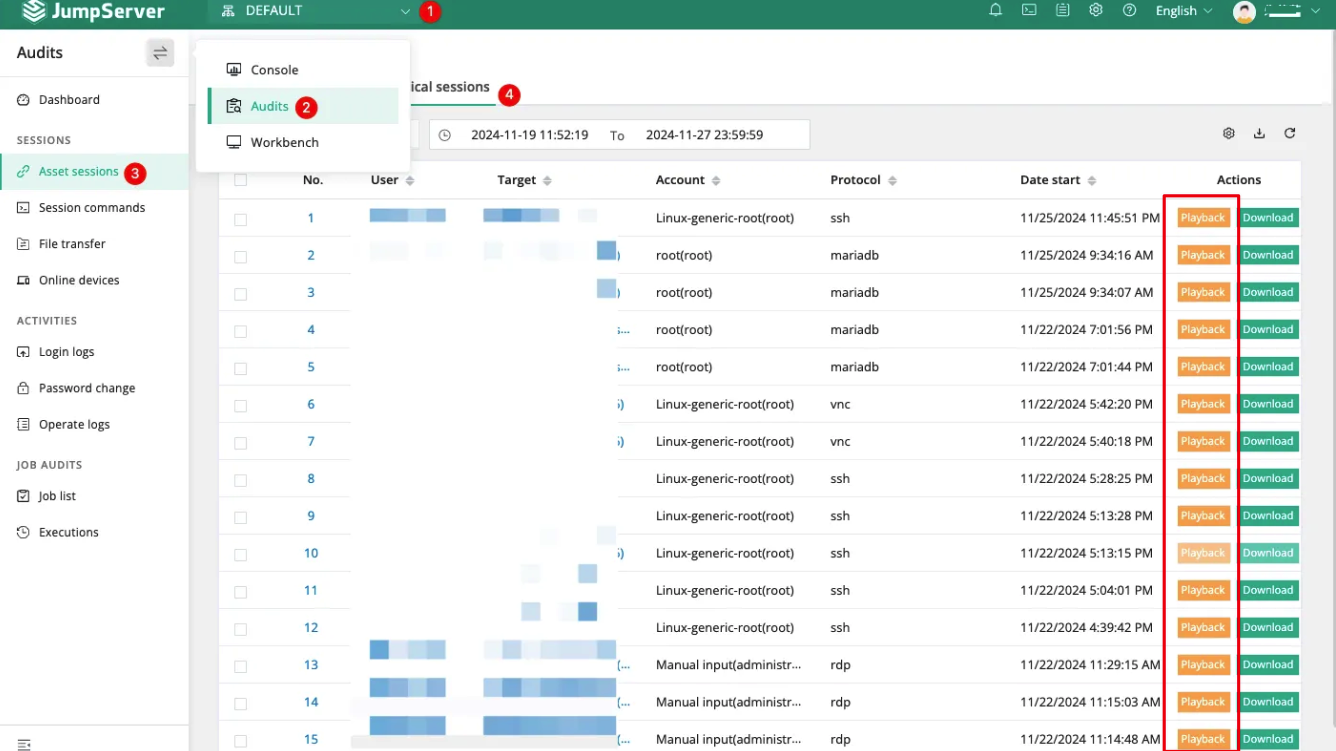
The online viewing location for video files is in "Audits" → "Asset Sessions" → "Historical Sessions".
Select the historical session you want to view and click "Replay" to watch.
Tips:
Linux sessions are recorded based on commands, so it may happen that there is a recording, but when you click to play it, there is no video. The duration option on the "Historical Sessions" page refers to the connection duration, not the session duration.
The "Replay" button and the "Download" button are grayed out and unclickable. This situation occurs because the session's connection duration is too short for JumpServer to consider it a successfully connected session.
Offline Playback
The following video playback methods are based on the situation where the bastion host has not enabled transcoding, meaning the video file format is not mp4. If you have enabled transcoding, and the video file has an mp4 extension, you can use any tool to play it.
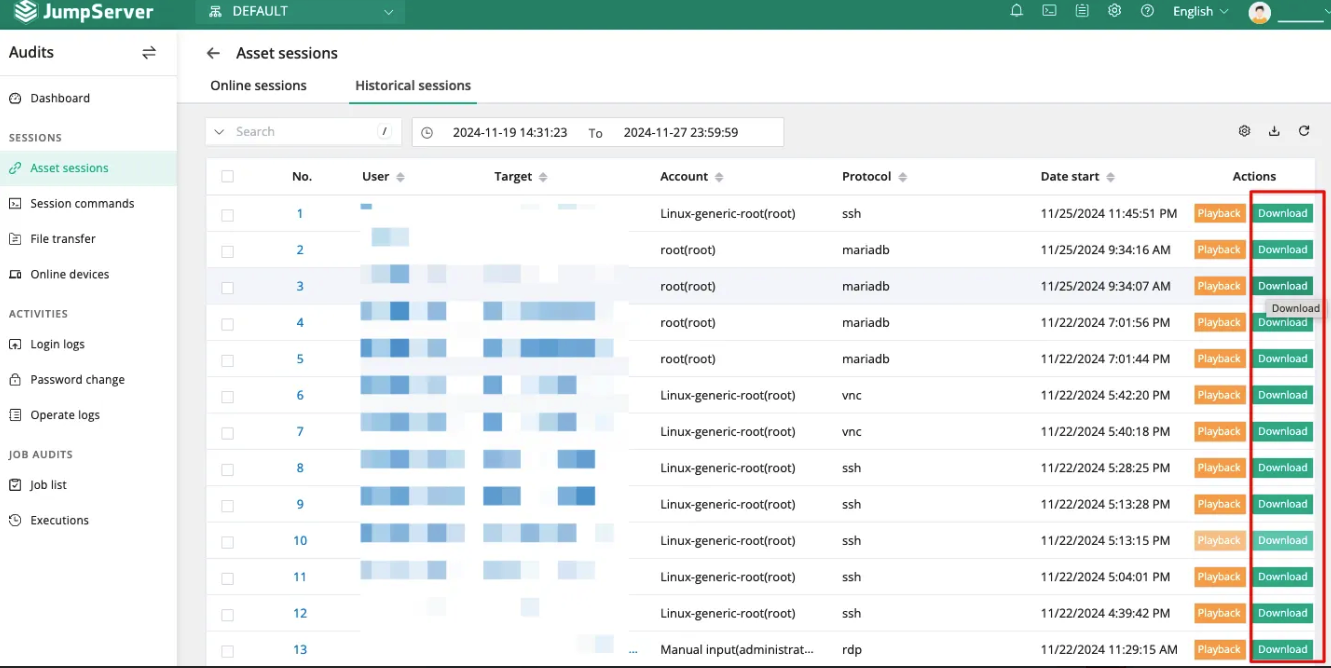
Downloading Video Files
Go to "Asset Sessions" → "Historical Sessions" to download the session recordings you want to view.
Play local video file
Playback Method 1: Built-in Player
Prerequisites: Access the bastion host's URL with the suffix "/player/", e.g., https://jumpserver.fit2cloud.com/player/
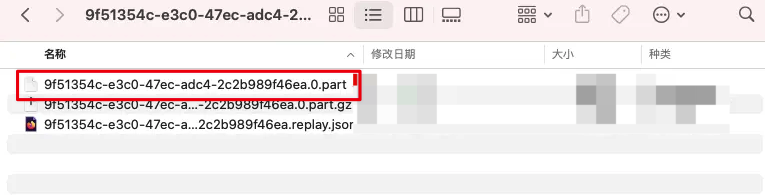
Supported video files: Only supports video files recorded from RDP and VNC protocol connections. Download the offline video files and unzip them twice.

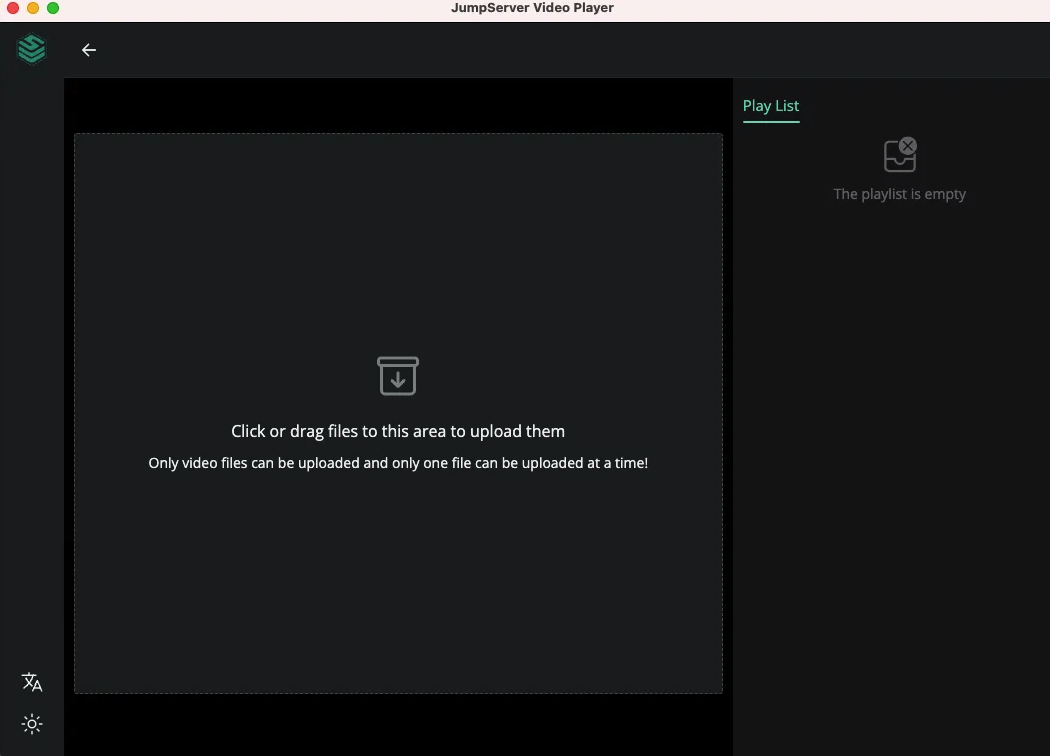
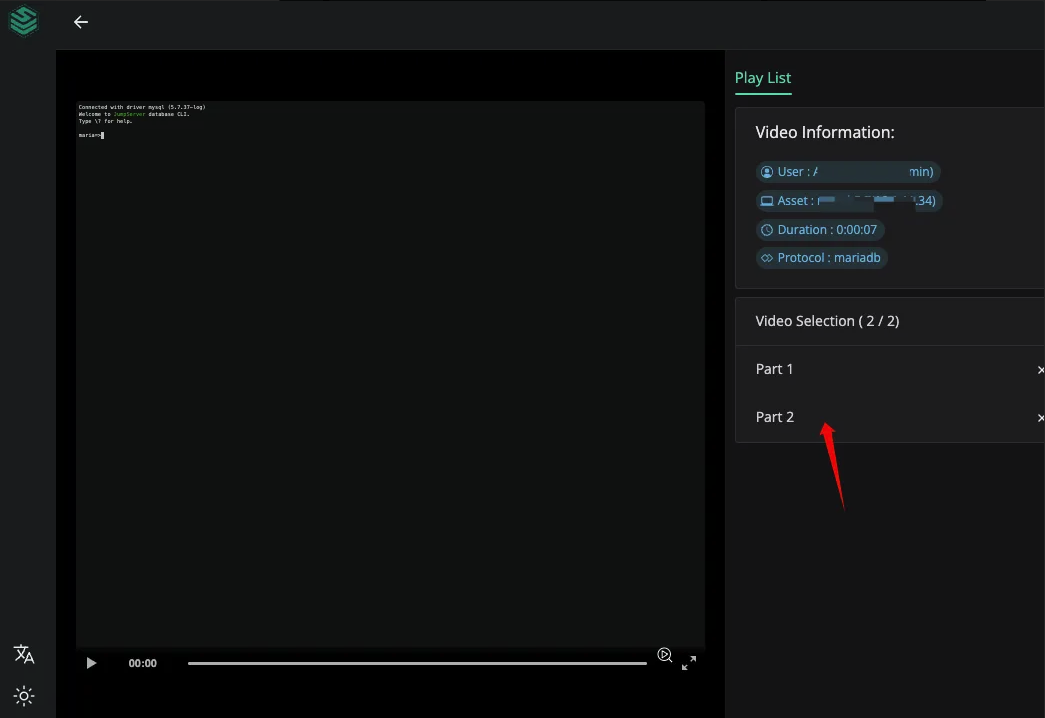
Playback Method 2: Offline Player
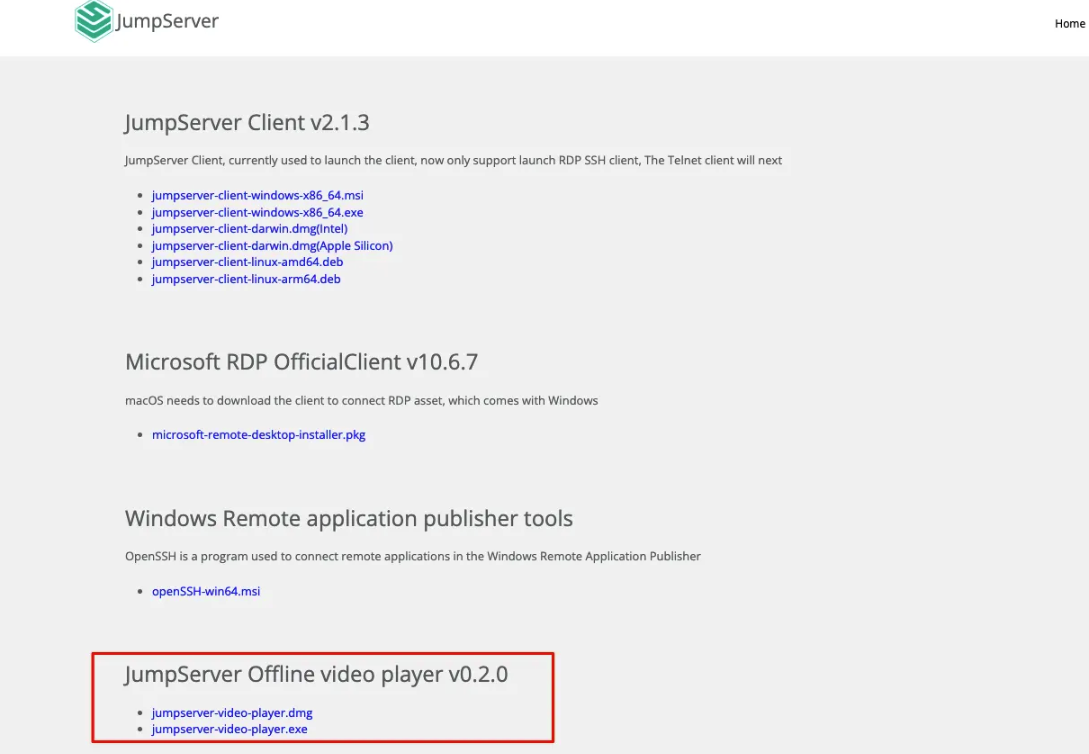
Prerequisites: Install JumpServer Video Player.
Supported video files: Supports playing video files recorded from SSH, RDP, and VNC protocol connections to assets, no unzipping required.
Player download link 1: https://github.com/jumpserver/VideoPlayer/releases/tag/v0.2.0
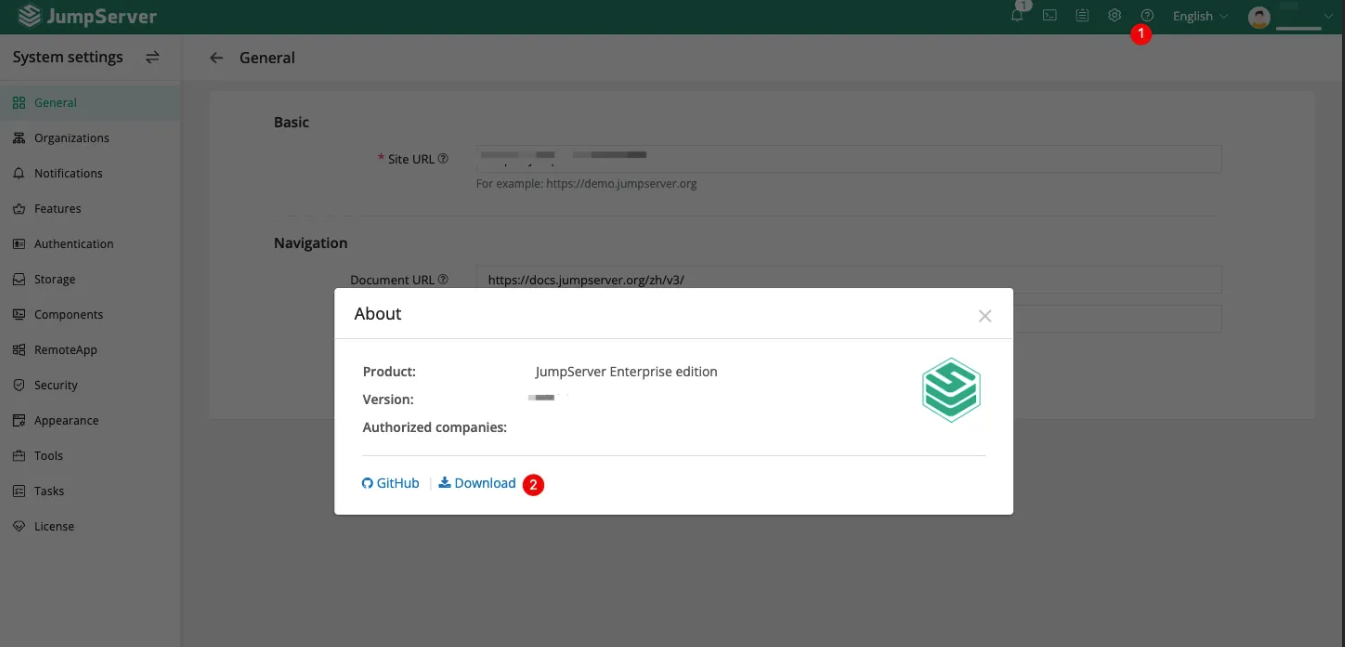
Player download link 2: Access the download page through the bastion host's access address.