Scenario Description
In the scenario of remotely managing Linux servers, administrators may encounter challenges in directly accessing the graphical user interface. For example, when configuring graphical applications or performing system settings, traditional SSH connections may not suffice due to the servers being located in data centers and not physically accessible. To address this issue, JumpServer supports managing Linux servers through the VNC protocol, enabling administrators to remotely access and operate the graphical interface of the servers, facilitating efficient software installation, system configuration, and troubleshooting. This feature significantly enhances the flexibility and efficiency of remote management.
Configuration Description
Configuration of the desktop environment and other settings is required on the Linux side.
Install Desktop Environment
In this example, GNOME desktop is installed. You can also install other desktop environments based on your needs, such as KDE, MATE, LXQt, Cinnamon, etc.
# List all installed and available software
yum grouplist

# Install the desktop environment
yum groupinstall -y "GNOME Desktop"

# Change the default boot mode of the Linux system to graphical interface
systemctl set-default graphical.target

# View the default boot mode of the Linux system
systemctl get-default

# Switch the default boot mode of the Linux system to command line
systemctl set-default multi-user.target
Install VNC server software
Install the VNC service on the Linux system and verify if the installation is successful.
# Install VNC service
yum install tigervnc-server -y

# Verify if the installation was successful
rpm -qa | grep tigervnc-server
Start a VNC desktop
Create a user <VNC-User> to connect to the VNC desktop.
# Create the <VNC-User> user
adduser VNC-User

# Set the login password for the <VNC-User> user
passwd VNC-User
Copy the VNC server startup service script [email protected] and rename it. For example: vncserver@:1.service, where "1" represents the desktop number. The corresponding port for this desktop is 5901, which is the VNC default port number plus the desktop number.
# Copy the VNC server startup script and rename it
cp /lib/systemd/system/[email protected] /etc/systemd/system/vncserver@:1.service
Edit the copied startup script to add the connecting user as <VNC-User>, as shown below:
# Edit the startup script to modify the <User> corresponding to the ExecStart parameter.
vim /etc/systemd/system/vncserver@\:1.service
[Unit]
Description=Remote desktop service (VNC)
After=syslog.target network.target

[Service]
Type=simple

# Clean any existing files in /tmp/.X11-unix environment
ExecStartPre=/bin/sh -c '/usr/bin/vncserver -kill %i > /dev/null 2>&1 || :'
ExecStart=/usr/bin/vncserver_wrapper VNC-User %i
ExecStop=/bin/sh -c '/usr/bin/vncserver -kill %i > /dev/null 2>&1 || :'

[Install]
WantedBy=multi-user.target
Log in to the Linux asset using the <VNC-User> user and set the VNC password.
# Switch to the <VNC-User> user
su - VNC-User

# Set the VNC password for the <VNC-User> user. After entering the password, you will be prompted whether to set this user to "view only" with no control permissions, which can be configured as needed.
vncpasswd
Switch to the root user and start the VNC service corresponding to the <VNC-User> user.
# Switch to the root user
su root

# Load the new configuration
systemctl daemon-reload

# Start the desktop 1 service corresponding to the <VNC-User> user
systemctl start vncserver@:1.service

# Set the desktop 1 service corresponding to the <VNC-User> user to start automatically at boot
systemctl enable vncserver@:1.service
Check if the port is listening and open the firewall policy for the port.
# Check the port listening status
[root@north-zhangbiao-linux ~]# netstat -nltp | grep Xvnc
tcp        0      0 0.0.0.0:5901            0.0.0.0:*               LISTEN      5033/Xvnc
tcp        0      0 0.0.0.0:6001            0.0.0.0:*               LISTEN      5033/Xvnc
tcp6       0      0 :::5901                 :::*                    LISTEN      5033/Xvnc
tcp6       0      0 :::6001                 :::*                    LISTEN      5033/Xvnc

# Open the corresponding firewall port
firewall-cmd --zone=public --add-port=5901/tcp --permanent  # Open port 5901
firewall-cmd --reload   # Reload firewall rules

# Disable SELINUX
sed -i 's/SELINUX=enforcing/SELINUX=disabled/g' /etc/selinux/config
With the Linux configuration complete, let's proceed to manage the VNC protocol Linux asset in JumpServer.
Manage asset
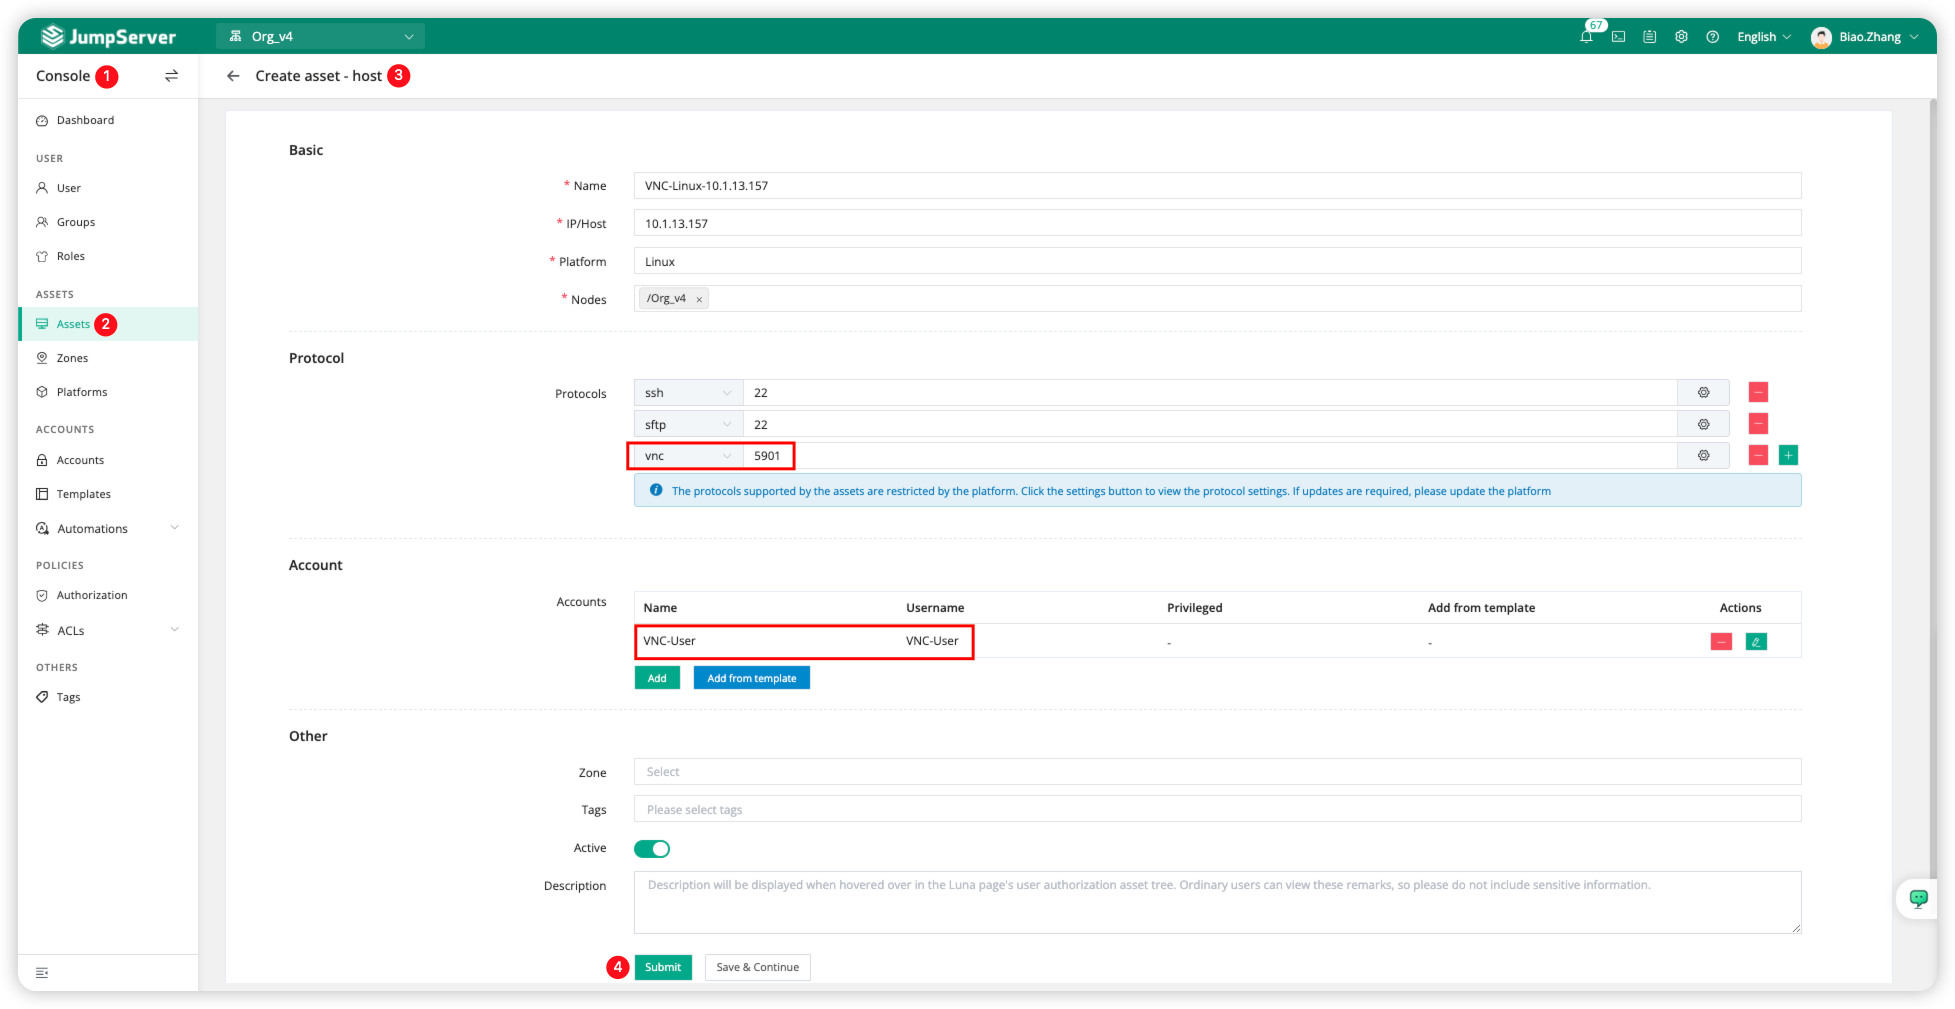
Switch to the JumpServer Console page, find <Assets>, and then click <Create> to fill in the host information.
For Protocols, we need to configure it as <VNC:5901>, and configure the user account <VNC-User> in the Account section before clicking Submit.
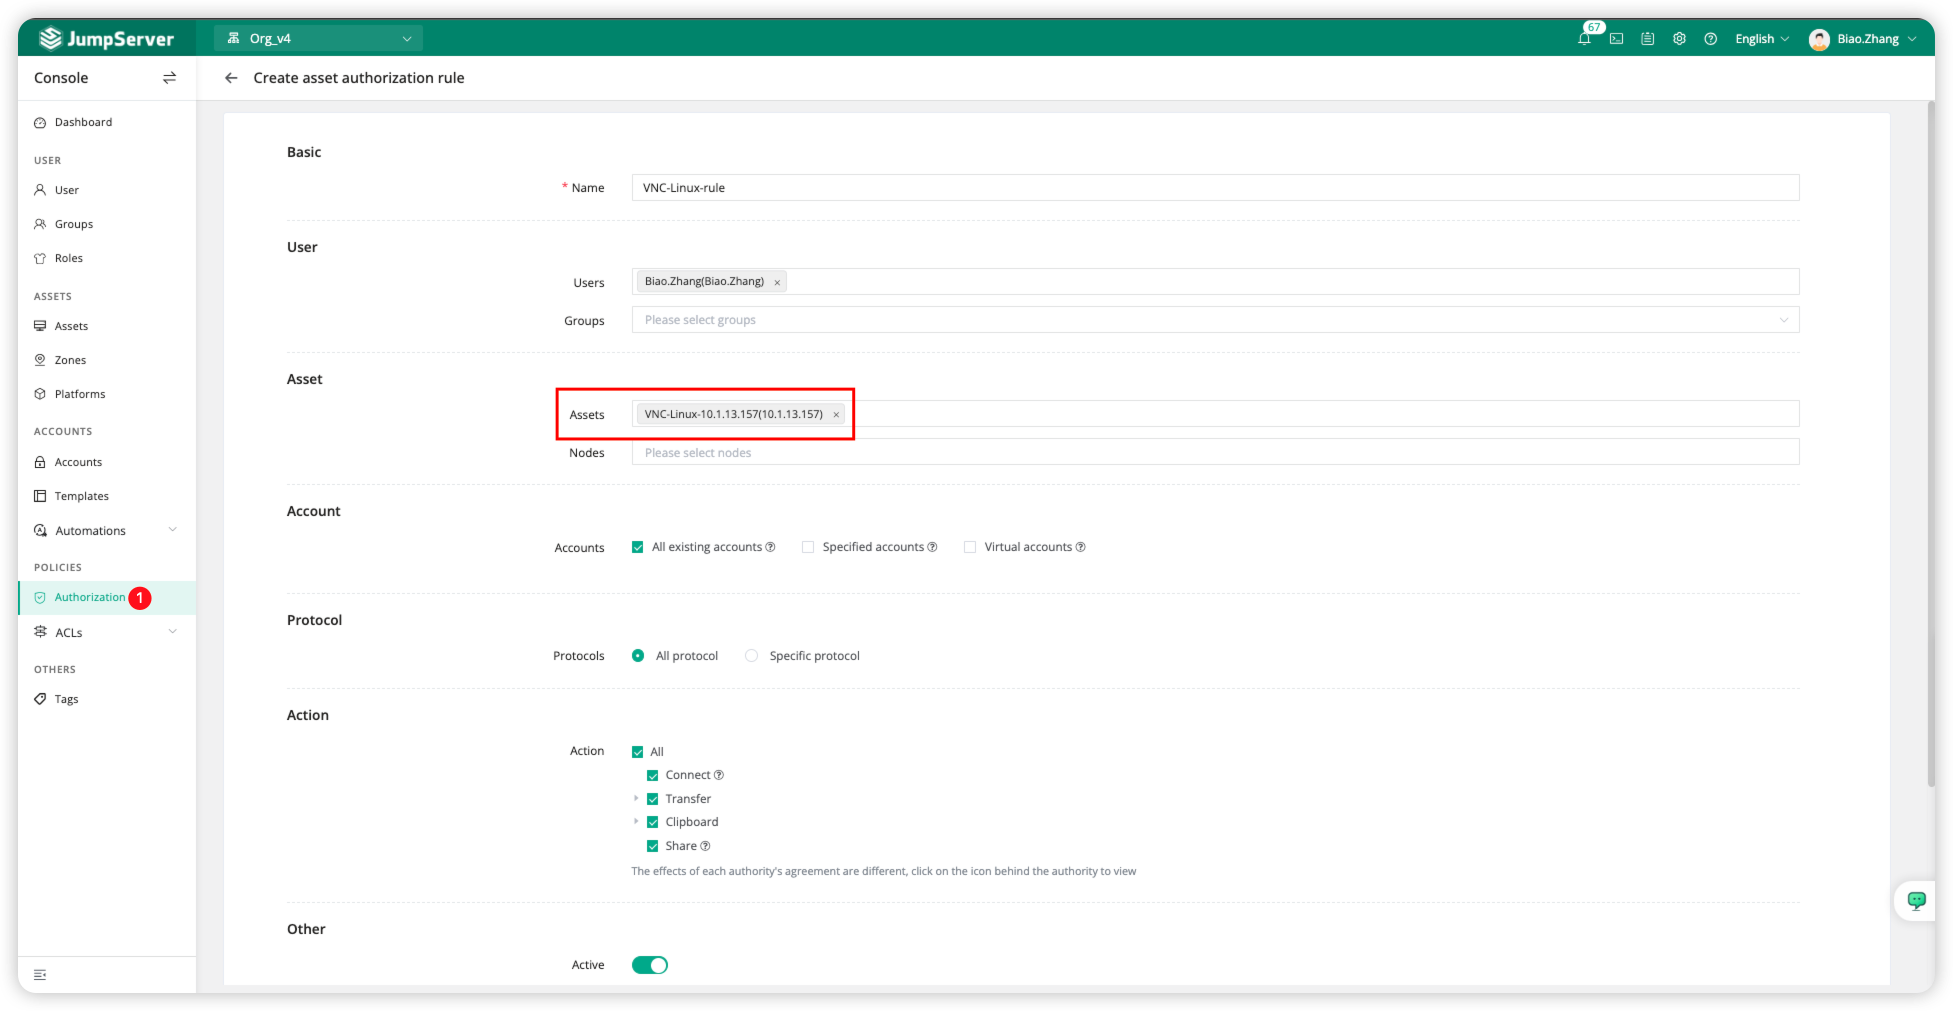
Create asset authorization rule
Click on the Authorization module, create an asset authorization rule, and fill in the relevant authorization information.
Function Verification
Switch to the JumpServer Web Terminal page, select the Linux asset with the VNC protocol for connection. On the connection page, choose the VNC protocol and select the VNC-User account.
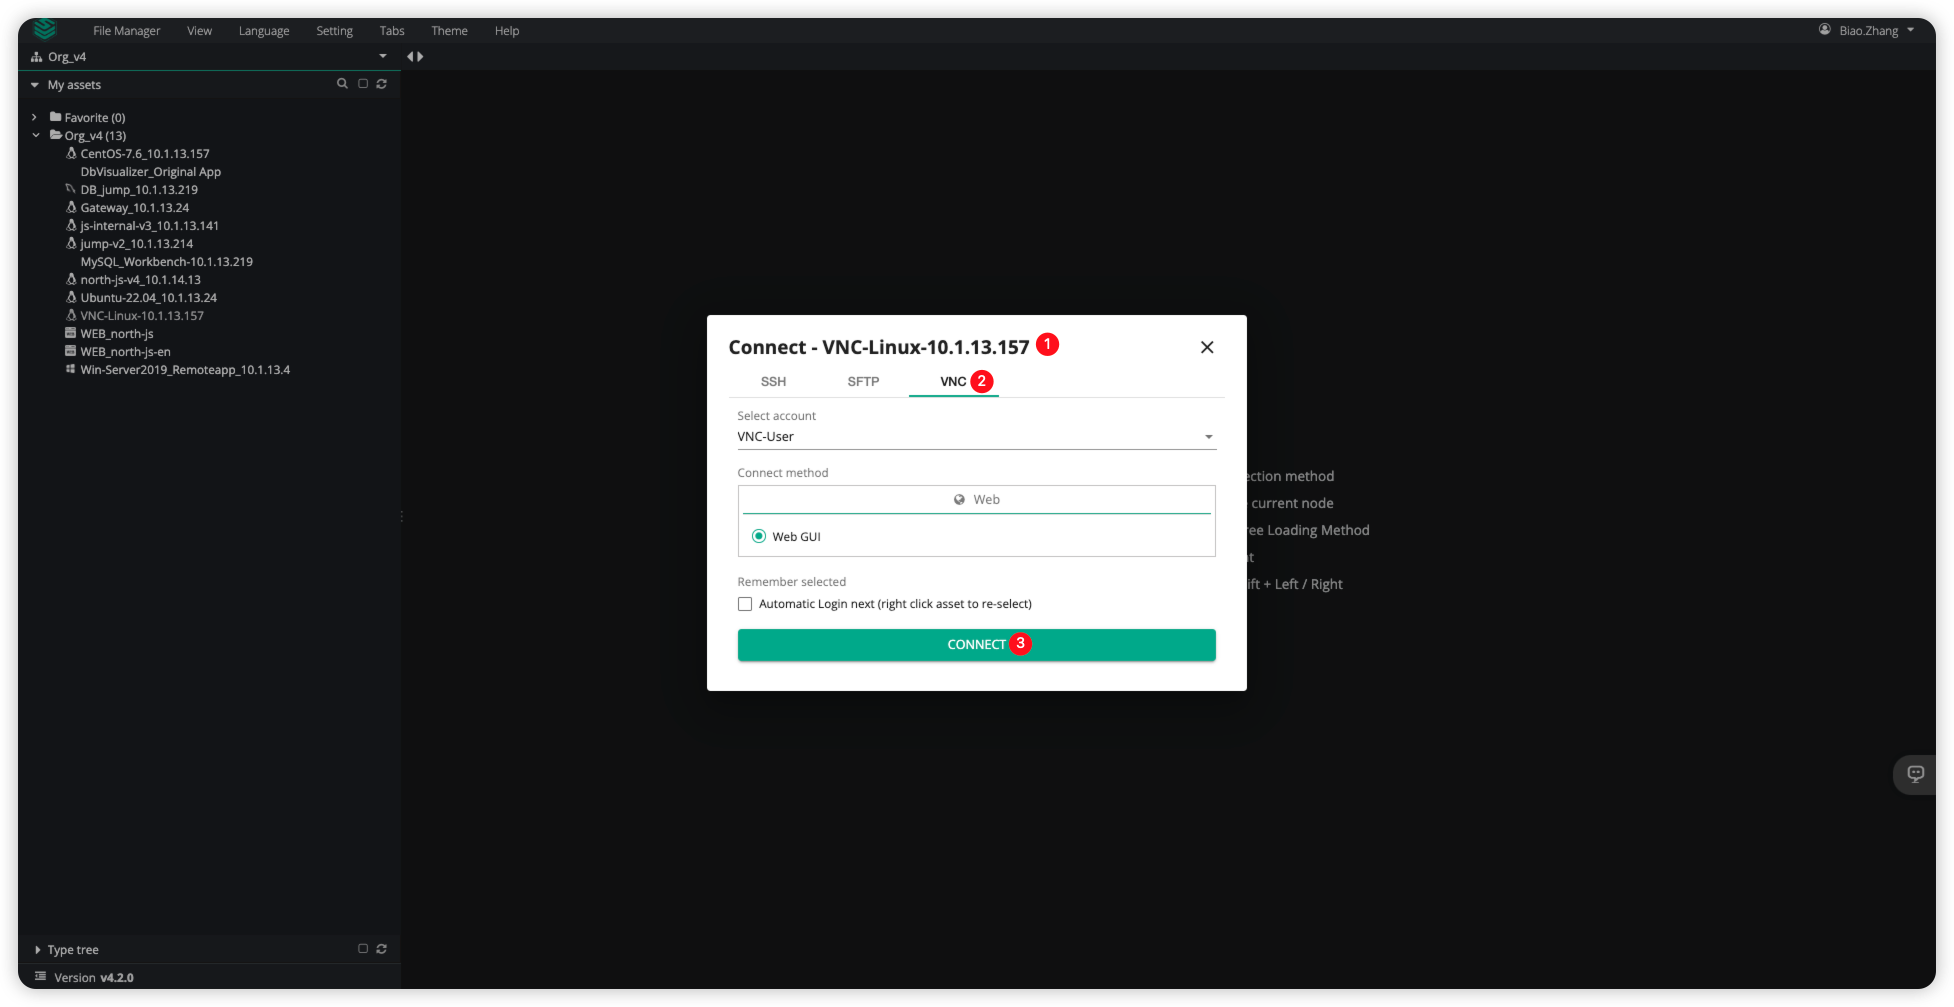
The connection effect is shown in the following image: